What Is a Cake Pan and How Do You Use It?
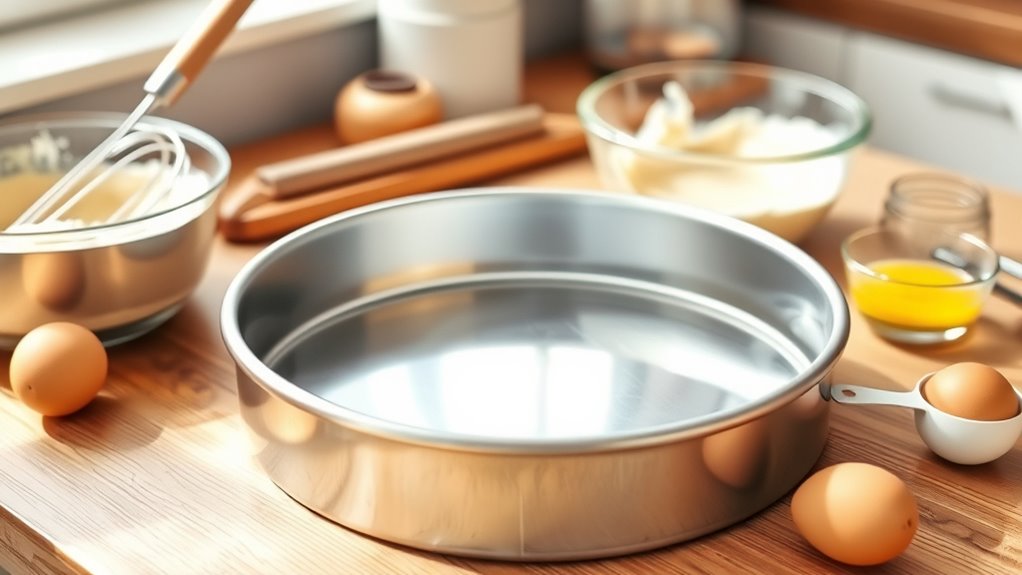
A cake pan is an essential baking tool that shapes and bakes your cake evenly while controlling how it rises to prevent spills or collapse. Choosing the right cake pan—whether round, square, bundt, or specialty shapes—depends on your recipe and occasion.
Using the proper pan ensures your cake bakes with the perfect texture and appearance.
Before baking, you’ll prep the pan by greasing or lining it to guarantee easy cake removal.
Pour the batter evenly and bake with the correct heat for the best results.
Keep reading to discover helpful tips on choosing, preparing, and using the right cake pan for your bake.
Key Takeaways
- A cake pan is a specially designed baking vessel that shapes cakes and ensures even heat distribution for uniform baking.
- Common cake pans include round, square, bundt, and specialty shapes, each affecting cake appearance and baking time.
- Prepare pans by greasing, flouring, or lining with parchment to prevent sticking and ensure easy cake removal.
- Pour batter evenly, smooth the surface, and bake with attention to temperature and timing for best results.
- Cool cakes in the pan for 10-15 minutes before gently removing to avoid damage and maintain shape.
What Is a Cake Pan? Why It’s Essential

Although you might think any baking dish will do, a cake pan is specially designed to give your cake the perfect shape and texture. When you use a cake pan, you guarantee even heat distribution, which helps your cake bake uniformly without dry edges or undercooked centers. It also controls the batter’s rise, so your cake doesn’t spill over or collapse.
Plus, its non-stick surface or proper greasing makes it easier for you to remove the cake without breaking it apart. Using the right cake pan saves you time and frustration, giving you consistent results every time. So, when you want a beautifully baked cake with the ideal crumb and shape, reaching for a cake pan is essential.
It’s your secret weapon in baking success.
Common Types of Cake Pans Explained
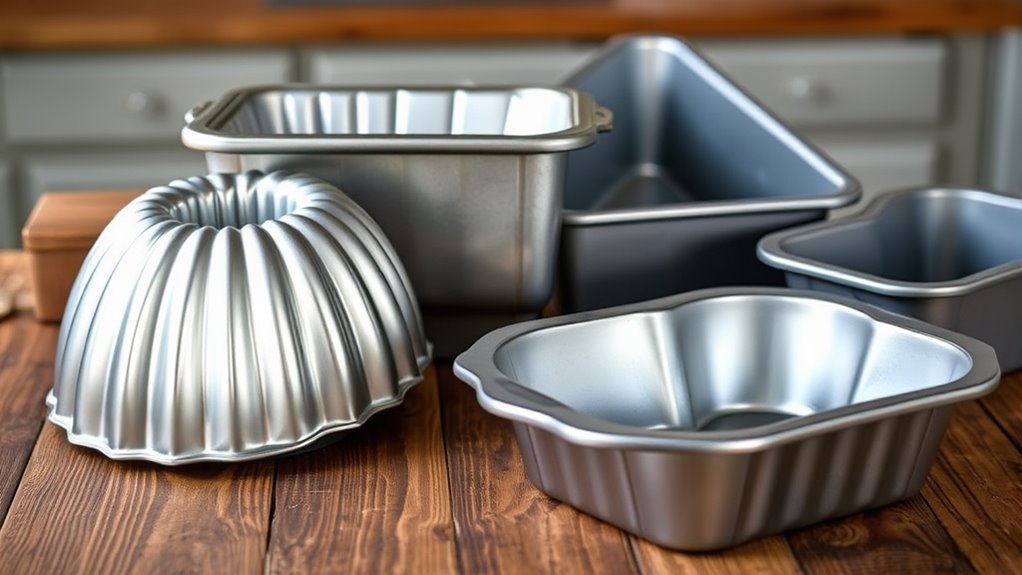
You’ll find cake pans come in various shapes like round, square, and bundt, each suited for different recipes. The material—whether metal, silicone, or glass—also affects how your cake bakes.
Understanding these options helps you pick the right pan for your baking needs.
Popular Cake Pan Shapes
When choosing a cake pan, the shape you pick can dramatically affect both the appearance and baking time of your cake. Round pans are the classic choice, perfect for layer cakes and evenly baking batter. Square and rectangular pans work well for sheet cakes or brownies, offering more surface area and quicker baking.
Bundt pans give you a decorative, ring-shaped cake with a stunning pattern, while loaf pans are great for denser cakes like pound cake or quick breads. Specialty shapes, like heart or star pans, add fun for themed occasions but may need adjusted baking times. By selecting the right shape, you can tailor your cake’s look and texture to match your recipe and occasion, ensuring your baking turns out just right every time.
Material Differences Explained
Since the material of your cake pan influences heat distribution and baking results, it’s important to choose the right one for your recipe. Different materials conduct heat differently, affecting how evenly your cake bakes and how its crust forms.
| Material | Heat Conductivity | Best For |
|---|---|---|
| Aluminum | High | Even baking, quick heating |
| Non-stick | Medium | Easy release, delicate cakes |
| Glass | Low | Slow, gentle baking |
| Silicone | Low | Flexible, easy unmolding |
| Stainless Steel | Medium | Durable, browning well |
How to Choose the Right Cake Pan for Your Recipe

Although choosing the right cake pan might seem simple, it can profoundly impact your cake’s texture and baking time. Start by considering the recipe’s shape and size requirements—round, square, or loaf pans each produce different results. Pay attention to the pan’s depth; deeper pans yield taller cakes but require longer baking.
Material matters too: metal pans conduct heat quickly, perfect for browning, while glass heats evenly but may need temperature adjustments. Nonstick pans help with easy release but can affect crust formation. Also, check if your recipe specifies a particular pan size—using a different size alters cooking time and cake density.
How to Prep Your Cake Pan for Baking
Choosing the right cake pan sets you up for success, but preparing that pan correctly makes certain your cake comes out clean and intact. Start by lightly greasing the pan with butter or oil, covering every corner to prevent sticking. Then, dust the pan with a thin layer of flour, shaking out the excess.
For sticky batters, consider lining the bottom with parchment paper cut to fit perfectly. If you’re using a nonstick or silicone pan, a quick grease might be enough, but it’s best to check your recipe’s recommendations. Properly prepping your pan not only protects your cake but also makes cleanup easier.
Taking these simple steps ensures your cake releases smoothly, keeping its shape and texture just right every time.
Pouring and Spreading Batter Evenly
When you pour your batter into the pan, aim to do so evenly to avoid uneven baking. Start by pouring the batter in the center, then gently tilt the pan to let it spread naturally toward the edges. This helps prevent thick spots that might stay undercooked.
Use a spatula or an offset knife to smooth the surface, ensuring an even layer. Don’t overwork the batter, as this can affect the texture. If your batter is thick, tap the pan lightly on the counter a couple of times to release air bubbles and settle the batter evenly.
Taking these simple steps helps your cake bake uniformly and come out with a consistent crumb and shape every time.
Baking Times and Temperatures for Cake Pans
You’ll need to adjust baking times based on the size of your cake pan to guarantee even cooking. Most cakes bake best at temperatures between 325°F and 350°F, but this can vary depending on the recipe. Paying attention to these details helps you avoid undercooked centers or overly browned edges.
Adjusting Times by Size
Baking times and temperatures vary considerably depending on the size of your cake pan. When you switch to a larger or smaller pan, you’ll need to modify the baking time to guarantee your cake cooks evenly without drying out or staying raw inside.
Here’s a quick guide:
- Smaller pans: Reduce baking time by about 5-10 minutes; cakes bake faster.
- Larger pans: Increase time by 10-15 minutes; cakes take longer to bake through.
- Deeper pans: Add 5-10 minutes due to thicker batter layers.
- Shallow pans: Decrease time since batter is spread thinner.
Always start checking for doneness 5 minutes before the adjusted time and use a toothpick test to avoid overbaking. Adjusting times carefully helps you get perfect results every time.
Ideal Oven Temperatures
Although oven temperatures can vary slightly, most cakes cook best between 325°F and 350°F. This range allows the batter to rise evenly without burning the edges or leaving the center undercooked. If you use a darker or nonstick cake pan, lower the temperature by 25°F to prevent over-browning.
Conversely, glass pans often require you to increase the temperature by 25°F because they retain heat differently. Always preheat your oven fully before placing the cake pan inside, so your cake bakes consistently. Keep an eye on your cake as it nears the end of the baking time, since small temperature differences affect doneness.
Using an oven thermometer helps maintain accuracy, ensuring your cake turns out moist and perfectly baked every time.
How to Test Cake Doneness Without Ruining Your Pan
When checking if your cake is done, it’s important to avoid damaging your pan, especially if it’s nonstick or delicate. Instead of stabbing the cake with a knife, use gentler methods that protect your bakeware. Here’s how you can test doneness without ruining your pan:
- Insert a toothpick or wooden skewer in the center; it should come out clean or with a few crumbs.
- Gently press the cake’s surface; it should spring back without leaving an indentation.
- Look for a golden-brown color around edges that start pulling away from the pan.
- Use a thin metal cake tester designed to be gentle on nonstick surfaces.
These techniques keep your pan intact while ensuring your cake bakes perfectly through.
Tips for Cooling and Removing Cakes Cleanly
Once your cake passes the doneness test, the next step is to cool it properly and remove it from the pan without damage. Let your cake cool in the pan for about 10-15 minutes; this allows it to firm up, making removal easier. Run a knife or offset spatula gently around the edges to loosen the cake.
Place a wire rack on top of the pan, then invert the pan and rack together. Lift the pan off carefully, letting the cake drop onto the rack. If your cake sticks, give it a gentle shake or tap the bottom of the pan.
Avoid forcing it out, which can cause cracks or breaks. Cooling on a wire rack guarantees even air circulation, preventing sogginess and keeping your cake’s texture perfect.
How to Clean and Store Your Cake Pans
To keep your cake pans in great shape, you’ll want to clean them properly right after use. Avoid harsh scrubbing and use gentle methods to preserve their nonstick coating.
When storing, make sure they’re completely dry and stacked carefully to prevent damage.
Proper Cleaning Techniques
Although cake pans may seem simple to clean, using the right techniques will keep them in great condition and extend their lifespan. Start by letting your pan cool completely before washing to avoid warping. Use warm, soapy water and a soft sponge to gently remove residue without scratching the surface.
Avoid harsh abrasives or metal scrubbers, especially on nonstick pans. For stubborn bits, soak the pan for 10-15 minutes before scrubbing gently. After washing, dry your pans thoroughly to prevent rust or water spots.
Here’s a quick checklist for proper cleaning:
- Let the pan cool completely before washing
- Use warm, soapy water and a soft sponge
- Soak stubborn residue before scrubbing gently
- Dry thoroughly to prevent rust and spots
Following these steps will preserve your cake pans’ quality for years.
Best Storage Practices
Where should you store your cake pans to keep them in the best shape? Store them in a dry, cool cabinet away from heavy pots or pans that could scratch or dent them. Stack pans with paper towels between each to prevent scratches.
Avoid damp or humid areas to stop rust, especially with metal pans.
Here’s a quick guide for storage:
| Storage Tip | Reason |
|---|---|
| Use a dry cabinet | Prevents rust and corrosion |
| Separate with towels | Avoids scratches and dents |
| Store upright | Saves space and reduces warping |
| Avoid stacking heavy | Protects pan shape and coating |
Following these tips helps you keep your cake pans in great condition, ready for your next baking project.
When and How to Use Specialty Cake Pans
When you want to create a cake that stands out, specialty cake pans give you the unique shapes and designs that standard pans can’t achieve. You’ll use these pans for occasions that call for a wow factor, like birthdays, holidays, or themed parties.
Before baking, make sure to grease the pan thoroughly to prevent sticking, and adjust your baking time since intricate shapes often bake unevenly. Specialty pans include:
Grease specialty pans well and adjust baking time to ensure even cooking for intricate shapes.
- Bundt pans for elegant ring-shaped cakes
- Heart-shaped pans perfect for romantic occasions
- Character pans to delight kids with favorite figures
- Mini loaf pans ideal for individual servings
How to Fix Common Cake Pan Issues
If your cake sticks to the pan or bakes unevenly, don’t worry—you can fix these common issues with a few simple adjustments. First, always grease and flour your pan or use parchment paper to prevent sticking.
For uneven baking, try rotating the pan halfway through baking or use an oven thermometer to ensure consistent heat.
| Issue | Solution |
|---|---|
| Cake sticks | Grease, flour, or line with parchment paper |
| Uneven baking | Rotate pan during baking |
| Overbrowning edges | Use an oven thermometer; lower oven temp |
| Cake sinks in middle | Avoid overmixing; check baking powder freshness |
| Difficult release | Let cake cool 10-15 minutes before removing |
These tips help you get perfect cakes every time!
Creative Non-Baking Uses for Cake Pans
Although cake pans are designed for baking, you can use them in many creative ways beyond the kitchen. They make excellent organizers and crafting tools, helping you keep things tidy or create unique projects. For example, you can:
Cake pans aren’t just for baking—they’re perfect for organizing and crafting in creative, unexpected ways.
- Use a round cake pan as a catch-all tray for keys, coins, or jewelry.
- Turn square pans into mini succulent gardens or terrariums.
- Use a bundt pan as a decorative centerpiece by filling it with candles or flowers.
- Repurpose pans as paint trays for your DIY projects, keeping colors separated and contained.
Frequently Asked Questions
Can I Use a Cake Pan in a Microwave?
You can use a cake pan in a microwave only if it’s microwave-safe, like silicone or glass. Avoid metal pans, as they can spark and damage your microwave or cause a fire hazard.
Always check the manufacturer’s guidelines to ensure the pan is microwave-safe. Using the wrong type of pan can lead to uneven cooking or even accidents.
When in doubt, opt for microwave-safe containers specifically designed for this purpose to keep your cooking safe and efficient.
Are Silicone Cake Pans Safe for High Heat?
You can totally trust silicone cake pans with high heat—they’re like superheroes that withstand oven temperatures up to 500°F! Just avoid direct flame or broilers, and you’ll bake safely without any worries or melting messes.
How Do I Prevent Cake Pans From Rusting?
You can prevent your cake pans from rusting by drying them thoroughly after washing, applying a light coat of oil, and storing them in a dry place.
Avoid soaking and harsh scrubbing to keep them rust-free.
Can Cake Pans Be Used for Savory Dishes?
You can absolutely use cake pans for savory dishes! Imagine golden quiches, layered lasagnas, or roasted vegetables baking evenly.
Just grease the pan well, and you’ll create delicious, beautifully shaped savory meals with ease.
What Is the Best Way to Recycle Old Cake Pans?
The best way to recycle old cake pans is to check if your local recycling center accepts metal cookware. If not, consider donating usable pans or repurposing them as plant trays or storage containers around your home.
Conclusion
So, now that you know a cake pan isn’t just a fancy lid for your oven, you’re ready to bake like a pro. It’s funny how something so simple can make or break your masterpiece, right?
But don’t worry—once you choose, prep, and pour carefully, your cake pan will be your best baking buddy. Just remember, even the fanciest pan won’t do the work for you—so get mixing and enjoy the sweet rewards!
In the end, the right cake pan and proper use are essential for perfect baking results. With the right cake pan, you can create delicious treats that everyone will love. So embrace your cake pan, and happy baking!