How to Clean a Blender in 7 Simple Steps
To clean your blender effectively and keep it in top condition, follow these seven simple steps. You’ll need soft sponges, dish soap, and warm water to get started. Proper blender cleaning is essential for maintaining hygiene and extending its lifespan.
First, unplug the blender and carefully disassemble all parts, handling the blades with care to avoid injury.
Rinse the jar and lid under running water, then wash them thoroughly with soapy water.
For stubborn odors, use natural cleaners like baking soda or vinegar to freshen up your blender.
Next, dry each piece completely to prevent mold and bacteria growth.
Wipe the blender base gently with a damp cloth without soaking it.
Finally, reassemble all parts securely, ensuring your blender is ready for the next use.
Follow these easy steps, and you’ll keep your blender fresh and lasting longer.
Key Takeaways
- Unplug the blender and carefully disassemble the jar, lid, gasket, and blade assembly following safety precautions.
- Rinse blender parts immediately after use to prevent residue buildup and odors.
- Wash jar and lid with warm soapy water, using a sponge or brush for thorough cleaning.
- Remove stubborn stains or odors with baking soda paste, vinegar soak, or lemon juice rinse.
- Dry all parts completely, wipe the base with a damp cloth, then securely reassemble the blender.
Why Clean Your Blender And How To Do It Quickly

Although it might seem tedious, cleaning your blender promptly prevents leftover food from hardening and keeps your appliance running smoothly. When you leave residue inside, it can cause unpleasant odors, attract bacteria, and even damage the blades over time.
To clean quickly, start by rinsing the jar immediately after use to remove most debris. Then, fill the blender halfway with warm water and a drop of dish soap. Secure the lid and run the blender on low for about 30 seconds—this loosens stuck-on food without scrubbing.
Afterward, rinse thoroughly with clean water and dry the parts. Taking these simple steps right away saves you time and effort later while maintaining your blender’s performance and hygiene.
Gather The Best Supplies For Cleaning Your Blender

Before you start cleaning, make sure you’ve got the right tools like a soft sponge and a bottle brush. Choose safe cleaning solutions that won’t damage your blender or leave harmful residues.
Also, clear and prepare your workspace to keep everything organized and easy to reach.
Essential Cleaning Tools
To clean your blender effectively, you’ll need a few essential tools that make the job quick and thorough. Start with a soft sponge or brush to reach all the nooks and crannies inside the jar without scratching it. A bottle brush or a small cleaning brush works perfectly for the hard-to-reach areas around the blades.
Have a microfiber cloth or clean dish towel handy to dry the blender parts after rinsing. Don’t forget gloves if you want to protect your hands, especially when handling the sharp blades. A sturdy basin or sink with running water makes rinsing easier.
With these tools ready, you’ll tackle your blender cleaning efficiently, ensuring it stays spotless and functions well every time you use it.
Safe Cleaning Solutions
Once you have the right tools, choosing safe cleaning solutions becomes the next step in keeping your blender spotless. You want solutions that effectively break down food residue without damaging your blender’s components or leaving harmful residues. Stick to gentle, non-toxic options that are safe for kitchen appliances and your health.
Consider these safe cleaning solutions:
- Mild dish soap: Cuts through grease and grime without harsh chemicals.
- White vinegar: Naturally disinfects and removes odors.
- Baking soda: Acts as a gentle abrasive to tackle stubborn stains.
- Warm water: Helps dissolve residues while being gentle on seals and blades.
Avoid bleach or abrasive cleaners that can corrode the blades or plastic parts. Using these safe solutions ensures a clean, long-lasting blender.
Preparing Your Workspace
Where should you set up your cleaning station for the best results? Choose a well-lit area near your sink with enough counter space to hold your blender parts and cleaning supplies. Gather everything you need before you start: a soft sponge or brush, dish soap, a clean cloth or towel, and a drying rack or mat.
Having these items within reach prevents interruptions and keeps your process smooth. If your blender has small crevices, consider a small brush or toothpick for detailed cleaning. Also, prepare a bowl of warm water to soak detachable parts if needed.
Disassemble Your Blender Parts Safely
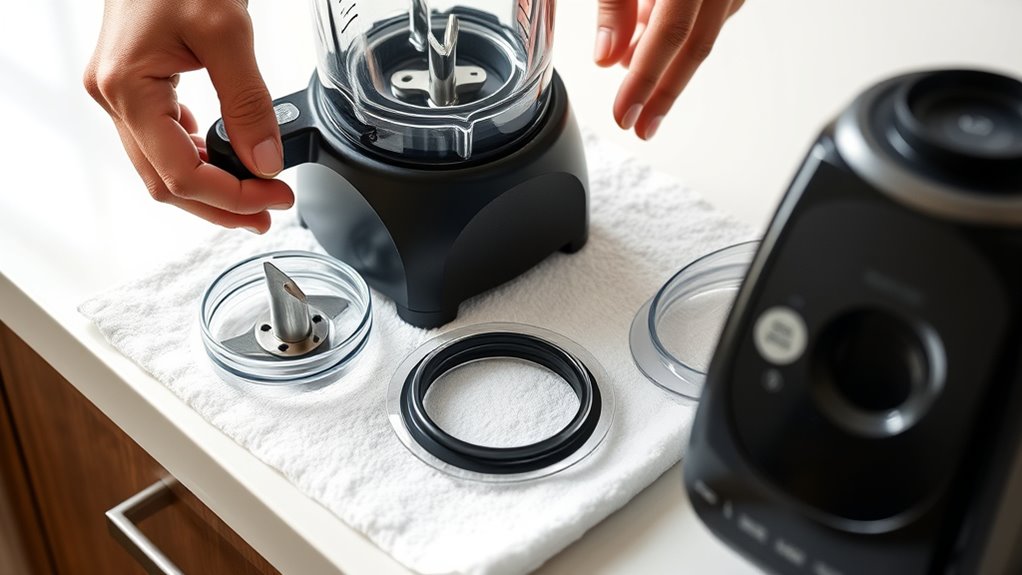
Before you start cleaning, make sure you unplug the blender to avoid any accidents. Next, carefully disassemble your blender parts to prevent damage and make cleaning easier.
Start by removing the blender jar from the base. Then, detach the lid and any removable parts like the gasket or blade assembly.
Keep these tips in mind for safe disassembly:
- Handle blades with care to avoid cuts.
- Use a towel or gloves when removing the blade assembly.
- Check the manufacturer’s instructions for specific disassembly steps.
- Avoid forcing parts apart to prevent breakage.
Rinse And Wash The Blender Jar And Lid With Soapy Water
After you’ve carefully taken apart your blender, it’s time to clean the jar and lid. Start by rinsing both under warm running water to remove any loose residue. Next, fill the jar halfway with warm water and add a few drops of dish soap.
Put the lid on securely, then hold the blender jar and swirl the soapy water around to reach all surfaces inside. Use a soft sponge or cloth to gently scrub the lid, paying attention to crevices where food particles may hide. Rinse both the jar and lid thoroughly with warm water to wash away all soap.
Finally, set them aside to air dry or wipe them with a clean towel before reassembling your blender.
Remove Stubborn Stains And Odors From Your Blender Jar
If your blender jar still holds onto stubborn stains or lingering odors, you can tackle them effectively using common household ingredients like baking soda, vinegar, or lemon. Start by sprinkling baking soda inside the jar, then add a little water to form a paste. Let it sit for 15-20 minutes before scrubbing gently.
Alternatively, fill the jar with equal parts vinegar and water, and let it soak for 30 minutes to neutralize odors. Lemon juice also works wonders—blend lemon slices with water for a fresh, clean scent.
- Use a soft brush or sponge to avoid scratching the jar
- Rinse thoroughly after treatment to remove residue
- For tough smells, repeat the process once or twice
- Avoid harsh chemicals that can damage the blender’s material
Wipe Down The Blender Base Safely Without Water
Since water can damage the blender’s electrical components, you’ll want to clean the base carefully without using any liquid. Start by unplugging the blender to guarantee safety. Use a dry microfiber cloth or a soft brush to remove dust, crumbs, and any loose debris from the surface and around buttons or knobs.
If there are sticky spots or stains, dampen a cloth slightly with a bit of rubbing alcohol or a mild, water-free cleaner—just make sure the cloth is just barely moist, not wet. Avoid spraying any cleaner directly onto the base. Gently wipe the affected areas, paying attention to crevices.
Let the base air out completely before plugging it back in. This method keeps your blender safe and clean without risking electrical damage.
Dry And Reassemble Your Blender Properly
Once you’ve carefully cleaned the blender base without using water, it’s important to guarantee every part is completely dry before putting everything back together. Moisture left on any component can lead to mold or damage electrical parts. Use a clean towel to dry the base and let removable pieces air dry fully.
When reassembling, follow these steps to ensure everything fits correctly and functions well:
- Check that the blade assembly is securely attached to the jar.
- Align the jar properly on the blender base to avoid leaks.
- Ensure the rubber gasket is in place to maintain a tight seal.
- Double-check that all parts click or twist into place firmly.
Taking these precautions ensures your blender stays safe and ready for your next blend.
Frequently Asked Questions
Can I Clean My Blender in the Dishwasher?
Yes, you can clean most blender parts in the dishwasher, but check the manufacturer’s instructions first.
Remove the blade assembly if possible, and place the jar and lid on the top rack to avoid damage during the wash cycle.
How Often Should I Deep Clean My Blender?
You should deep clean your blender about once a week or after blending sticky or oily ingredients. This keeps it fresh, prevents buildup, and guarantees your blender works efficiently every time you use it.
Are There Natural Cleaning Alternatives for Blenders?
You can’t beat nature’s magic wand—lemon and baking soda work wonders! Just blend lemon juice with water, then scrub with baking soda.
You’ll have your blender sparkling clean without harsh chemicals or fuss.
Can I Use Bleach to Sanitize My Blender?
You can use bleach to sanitize your blender, but dilute it properly with water to avoid damage or residue. Rinse thoroughly afterward to guarantee no bleach remains before using your blender again for safety.
How Do I Prevent Blender Blades From Rusting?
Rust on blender blades? Don’t let it sneak up! You’ll want to dry blades thoroughly after each wash, avoid harsh detergents, and occasionally oil them lightly with food-safe oil to keep rust at bay and blades spinning sharp.
Conclusion
Keeping your blender clean not only extends its life but also guarantees every smoothie tastes fresh. Did you know that 70% of kitchen appliances harbor bacteria if not cleaned regularly? By following these simple steps, you’ll avoid that buildup and enjoy a spotless blender every time.
It’s quick, easy, and worth it—your health and taste buds will thank you! So, take a few minutes now and keep blending worry-free. Regular blender cleaning is essential for maintaining hygiene and ensuring the best flavor in your drinks.
Make cleaning your blender a part of your routine to enjoy a fresh and healthy smoothie every time. Proper blender maintenance helps prevent bacteria buildup and extends the life of your appliance. Start today and experience the benefits of a clean blender!