How to Line a Cake Pan With Parchment Paper
To line your cake pan with parchment paper, start by greasing the pan lightly. This helps the parchment paper stick and prevents it from shifting during baking. Properly lining your cake pan is essential for easy cake removal and even baking.
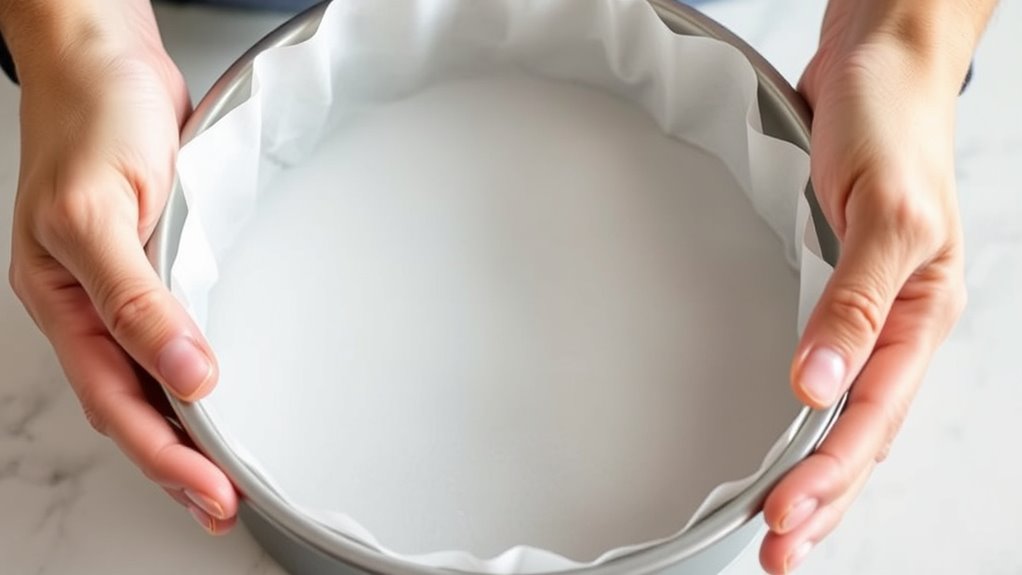
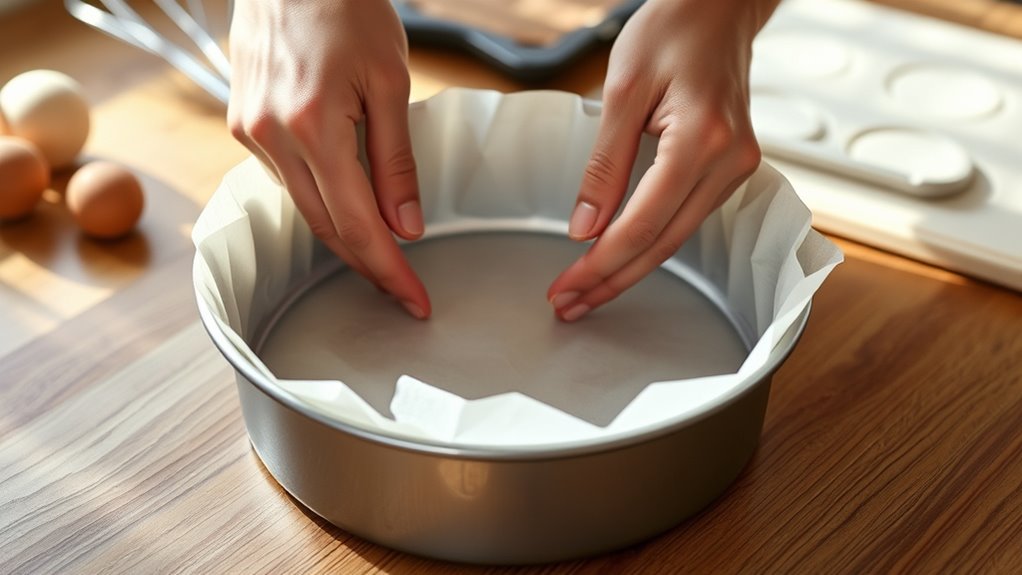
Next, measure the bottom and sides of your pan carefully. Cut the parchment paper to fit snugly—use a circle with small slits for round pans or fold the corners neatly for square pans. Press the paper smoothly into the corners, avoiding wrinkles and bubbles to ensure even baking.
After baking, loosen the edges of the cake and lift it out using the parchment paper. This technique provides a clean release and makes cleanup easier. Keep practicing to master flawless lining and enjoy hassle-free baking every time.
Key Takeaways
- Measure the pan’s bottom and sides, then cut parchment paper accordingly for a snug fit without excess or gaps.
- Grease the pan lightly with butter, shortening, or non-stick spray before placing parchment to prevent slipping.
- Trace the pan bottom on parchment, cut the shape, then cut strips for the sides and fit them smoothly inside.
- Press parchment gently into corners and sides, smoothing out wrinkles and bubbles for even baking and clean release.
- After baking, cool cake fully, loosen edges with a knife, and lift cake by parchment edges for intact removal.
Why Line Your Cake Pan With Parchment Paper
Although you might think greasing your pan is enough, lining it with parchment paper guarantees your cake releases cleanly without sticking. When you use parchment, you avoid the frustration of your cake breaking apart while trying to remove it. It creates a nonstick barrier that even the best greasing can’t always provide.
Plus, parchment paper helps your cake bake more evenly by preventing hot spots and promoting gentle heat distribution. It also makes cleanup a breeze since the pan stays cleaner. Even if you’re careful with butter or spray, parchment gives you extra confidence that your cake will come out perfectly shaped every time.
What Materials You Need to Line a Cake Pan
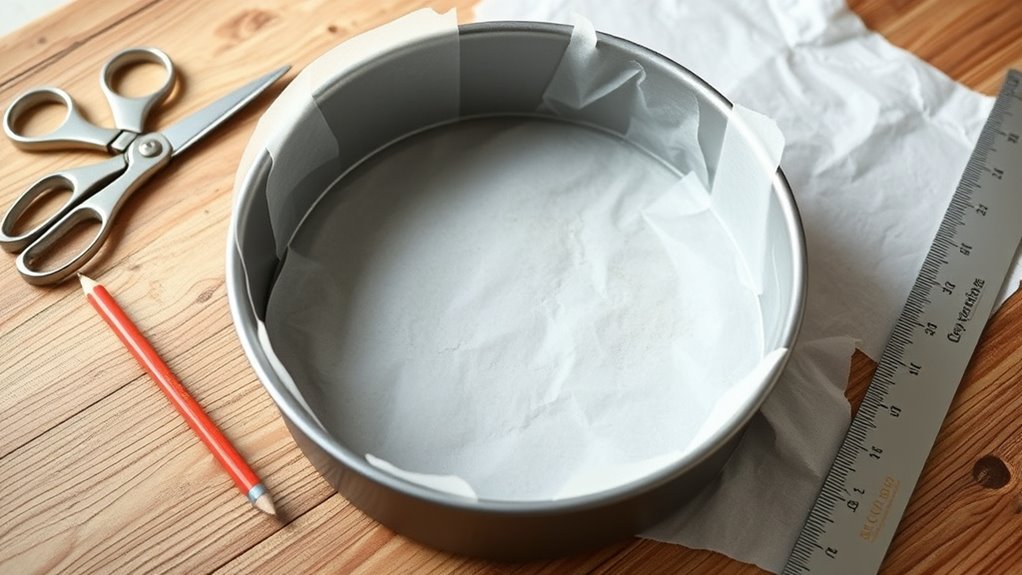
Before you start lining your cake pan, gather a few essential materials to make the process smooth and effective. You’ll need parchment paper, which is oven-safe and non-stick, perfect for preventing cakes from sticking. Have a pair of sharp scissors ready to cut the parchment to fit your pan’s shape.
A pencil or pen will help you trace the pan’s outline onto the parchment. If you want extra security, keep some butter or non-stick spray handy to grease the pan lightly before placing the parchment. A ruler or measuring tape can be useful later, but for now, just focus on these basics.
With these materials in hand, you’ll be set to line your cake pan neatly and efficiently every time.
How to Measure Your Cake Pan for Parchment Paper
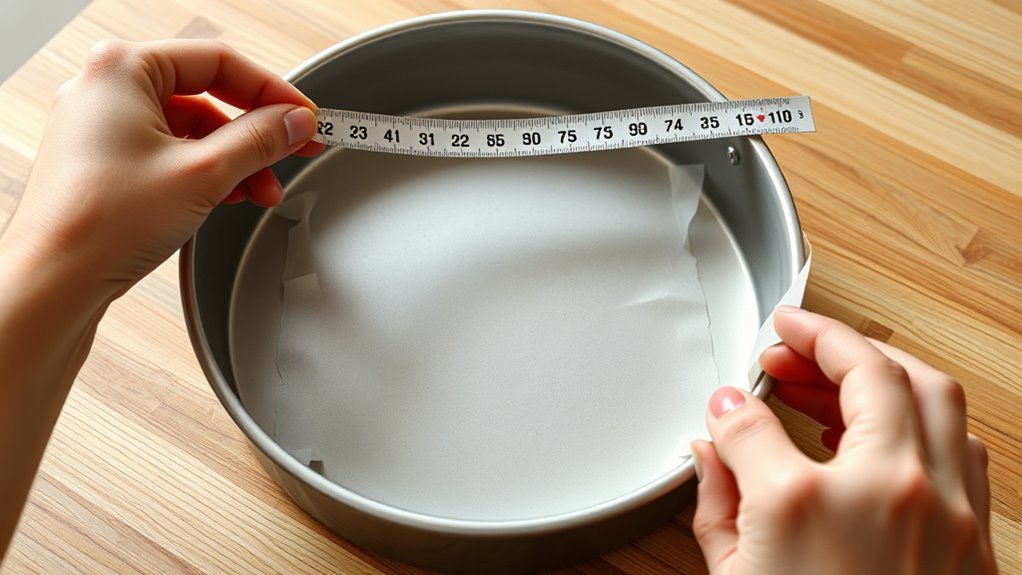
To get the perfect parchment fit, you’ll need to measure your cake pan carefully. Start by measuring the bottom of the pan, then add the height of the sides to guarantee full coverage.
This way, your parchment will line the pan smoothly without any gaps or overhangs.
Determine Pan Dimensions
Measuring your cake pan accurately is the first step to cutting parchment paper that fits perfectly. Start by identifying the shape of your pan—round, square, or rectangular—since this affects how you measure. For round pans, measure the diameter across the top from one edge to the other.
For square or rectangular pans, measure the length and width across the top edges. Don’t forget to note the height of the pan’s sides; this helps you determine how much parchment you’ll need to cover the sides properly. Write down these dimensions clearly before you begin cutting.
Knowing your pan’s exact size guarantees that the parchment paper fits snugly, preventing batter leaks and uneven baking. This preparation saves time and results in a well-lined pan every time.
Measure Pan Bottom Accurately
After noting your pan’s dimensions, focus on measuring the bottom accurately to guarantee your parchment fits perfectly. Use a ruler or measuring tape to get the exact length and width of the pan’s base. Place the ruler flat against the bottom surface, measuring from one edge straight across to the opposite edge.
For round pans, measure the diameter by placing the ruler across the center from one side to the other. Double-check your measurements to avoid mistakes that could cause the parchment to be too small or too large. Writing down these numbers helps you cut the parchment paper precisely, ensuring it fits snugly without excess paper bunching up or folding.
This step sets the foundation for a well-lined pan and a smooth baking process.
Account For Pan Sides
Since the bottom measurement alone won’t cover it, you’ll need to include the height of the pan’s sides when cutting your parchment paper. Start by measuring the height of the pan’s sides from the bottom to the top edge. Add this height measurement to each side of the bottom’s length and width.
For example, if your pan bottom measures 8 inches by 8 inches and the sides are 2 inches tall, cut a parchment piece that’s 12 inches by 12 inches (8 + 2 + 2). This extra parchment will wrap up the sides, ensuring complete coverage and easy cake release.
Don’t forget to smooth the parchment against the sides once you place it in the pan, so it stays put during pouring and baking.
How to Cut Parchment Paper for Any Pan Shape
When you need to line a cake pan, cutting parchment paper to fit its unique shape is essential for easy cake removal. Start by tracing the pan’s bottom on the parchment, then cut along the line. For pans with sides, measure the height and add strips of parchment to cover them.
For odd shapes, fold the parchment paper in half or quarters, then trim the edges so it fits snugly. Remember to keep your cuts clean for a smooth fit.
Here’s how to cut parchment paper for any pan shape:
- Trace the pan bottom and cut precisely
- Measure and cut strips for pan sides
- Fold paper for odd shapes before trimming
- Use sharp scissors for clean edges
This method ensures your parchment fits perfectly every time.
How to Fit Parchment Paper in Round, Square, and Rectangular Pans
Although lining pans might seem straightforward, fitting parchment paper correctly in round, square, and rectangular pans takes a bit of technique. For round pans, start by cutting a circle using the pan as a template. To guarantee a snug fit on the sides, cut several small slits around the edge of the circle.
Gently press the paper into the pan, smoothing the slits down the curved sides. For square or rectangular pans, cut a piece slightly larger than the base. Fold the paper along the corners to create clean edges, then press it into the pan.
Trim any excess paper extending beyond the rim to avoid burning or uneven baking. This method helps the parchment stay put and prevents batter from leaking underneath.
How to Line Layer and Bundt Cake Pans With Parchment Paper
To line layer and Bundt cake pans, start by measuring and cutting parchment paper to fit the unique shapes. You’ll need to shape the paper carefully to match the pan’s curves and edges.
Then, secure the paper in place to prevent it from shifting while you pour in the batter.
Measuring And Cutting Paper
Before cutting your parchment paper, make sure you measure your cake pan accurately to guarantee a perfect fit. Use a ruler or measuring tape to get the exact diameter or length and width of the pan’s base. If your pan is round, measure across the center; for square or rectangular pans, measure both sides.
Mark your parchment paper with a pencil or a pen to guide your cuts.
Keep these tips in mind when measuring and cutting:
- Measure twice to avoid mistakes.
- Use a sharp pair of scissors for clean edges.
- Allow extra paper for the sides if lining the pan’s walls.
- Cut slowly to maintain control and precision.
Following these steps will assure your parchment paper fits neatly inside your cake pan.
Shaping Paper For Pans
Since every cake pan shape demands a slightly different approach, shaping parchment paper correctly guarantees your cake releases easily and bakes evenly. For round or square layer pans, cut a circle or square that fits snugly inside the base, then trim strips to line the sides. Press the paper firmly into corners or curves to avoid air pockets.
When working with Bundt pans, which have a central tube, cut a long strip wide enough to cover the sides, plus a separate circle with a hole punched in the center for the tube. Gently press the strips and circle into place, following the pan’s contours. Taking your time here guarantees the paper stays flush against the pan, preventing sticking and promoting even baking.
Securing Paper In Place
Although shaping parchment paper carefully is important, securing it properly guarantees it stays in place throughout baking. You don’t want the paper shifting or folding, which can ruin your cake’s shape. To keep the parchment steady, try these simple techniques:
- Lightly grease the pan before placing the parchment to help it stick.
- Use binder clips on the edges of the pan to hold the paper firmly.
- Press the paper into corners and creases, smoothing out wrinkles.
- For Bundt pans, cut slits in the paper to fit the curves snugly.
How to Grease Your Cake Pan Before Lining With Parchment Paper
To guarantee your parchment paper sticks well and stays in place, you’ll want to grease your cake pan thoroughly. Start by choosing your grease: butter, shortening, or non-stick spray. Use a pastry brush or paper towel to apply an even, thin coating to the bottom and sides of the pan.
This prevents the parchment from sliding and helps your cake release easily.
| Grease Type | Application Tool | Benefits |
|---|---|---|
| Butter | Pastry brush | Adds flavor, natural |
| Shortening | Paper towel | Easy spread, neutral |
| Non-stick spray | Direct spray | Quick, even coverage |
Greasing your pan well ensures the parchment stays put, making your baking process smoother and cleanup easier.
How to Avoid Wrinkles and Bubbles When Lining Your Pan
Greasing your pan well sets the stage for a smooth parchment lining, but the next step is making sure the paper lies flat without wrinkles or bubbles. To do this, start by cutting your parchment slightly larger than the pan so it fits snugly. Press the paper gently into the corners, smoothing as you go to avoid folds.
If you notice any bubbles, lift that section and reposition it carefully. You can also lightly coat the top of the pan before placing the parchment to help it stick better.
- Cut parchment slightly larger than the pan
- Press paper gently into corners and sides
- Smooth out bubbles by lifting and repositioning
- Lightly coat pan top for better parchment adherence
These steps ensure your cake bakes evenly and releases cleanly.
How to Remove Your Cake Cleanly Using Parchment Paper
Once your cake has cooled, gently lifting it out of the pan becomes much easier with parchment paper lining. To remove your cake cleanly, run a thin knife around the edges to loosen it from the pan.
Then, grab the parchment paper edges and carefully lift the cake out. This method minimizes sticking and keeps your cake intact.
| Step | Action | Tip |
|---|---|---|
| 1 | Cool the cake completely | Warm cakes stick more |
| 2 | Loosen edges with a knife | Use a thin, flexible knife |
| 3 | Lift cake using parchment | Hold edges firmly but gently |
| 4 | Transfer to cooling rack | Support bottom with hands |
Following these steps guarantees your cake comes out smoothly every time.
Common Lining Mistakes and How to Fix Them
Although lining a cake pan with parchment paper seems straightforward, many bakers make common mistakes that can affect the final result. You might find the paper slipping, wrinkling, or not fitting properly, which can cause uneven baking or sticking. To avoid these issues, pay attention to these common pitfalls:
- Using parchment too small or too large, causing folds or gaps. Cut it to fit snugly.
- Skipping the greasing step before placing parchment, making it shift around.
- Not smoothing out wrinkles, which can leave imprints on the cake.
- Forgetting to line the sides, risking cake sides sticking to the pan.
Fix these by trimming carefully, lightly greasing, smoothing the paper, and lining the sides fully for perfect results.
How to Reuse and Store Parchment Paper After Baking
If you want to get the most out of your parchment paper, knowing how to reuse and store it properly can save you money and reduce waste. After baking, gently wipe off crumbs or grease without tearing the paper. If it’s still sturdy and clean, you can reuse it for a similar baking task.
Store your parchment flat or rolled to avoid creases, and keep it in a dry place.
| Step | What to Do | Tip |
|---|---|---|
| Remove | Carefully peel from pan | Avoid tearing |
| Clean | Wipe off crumbs or grease | Use a damp cloth |
| Store | Roll or lay flat | Keep away from moisture |
| Reuse | Use for less sticky baking | Don’t reuse if burnt |
Reuse smartly to extend your parchment paper’s life!
Frequently Asked Questions
Can Parchment Paper Withstand High Oven Temperatures?
Yes, parchment paper can withstand high oven temperatures, typically up to 420°F (215°C). You’ll want to avoid placing it under a broiler or directly on open flames, as it can burn or catch fire.
Always check the manufacturer’s guidelines for specific temperature limits. Using parchment paper within these limits ensures safe and effective baking.
If you need to cook at temperatures higher than 420°F, consider alternatives like silicone baking mats or aluminum foil.
Is Parchment Paper Safe for Microwave Use?
Imagine a gentle cloud shielding your food—yes, parchment paper is safe in the microwave. It won’t melt or release harmful chemicals, so you can confidently use it to cover or wrap your meals without worry.
Can I Use Wax Paper Instead of Parchment Paper?
You shouldn’t use wax paper instead of parchment paper because wax paper can melt or catch fire in the oven. Parchment paper is heat-resistant and non-stick, making it safer and better for baking tasks like lining cake pans.
Does Parchment Paper Affect Baking Time or Temperature?
No, parchment paper doesn’t affect baking time or temperature. It simply prevents sticking and promotes even baking.
You can stick to your recipe’s instructions without adjusting heat or time when using parchment paper in your pans.
How Environmentally Friendly Is Parchment Paper?
You’re holding a smooth, crinkly sheet that’s mostly biodegradable and compostable, so parchment paper is fairly eco-friendly.
Just opt for unbleached, chlorine-free types to keep your baking greener and reduce harmful chemical waste.
Conclusion
Lining your cake pan with parchment paper is like giving your cake a smooth runway to take off—no sticking, no mess. With just a few simple steps, you’ll glide through baking like a pro, creating perfect edges and easy releases every time.
So next time you prep your pan, remember: a little parchment paper is the secret that turns your baking journey from a bumpy road into a sweet, effortless flight. Using parchment paper to line your cake pan ensures your cake comes out cleanly and beautifully every time.
Mastering how to line a cake pan with parchment paper is an essential baking tip that guarantees success and makes cleanup a breeze.