How to Shred Cheese Without a Grater Easily
You can easily shred cheese without a grater by chilling it first to firm up. This simple method helps you achieve perfect shredded cheese without the hassle of a traditional grater.
Using a sharp knife or kitchen scissors provides an efficient alternative for shredding cheese at home.
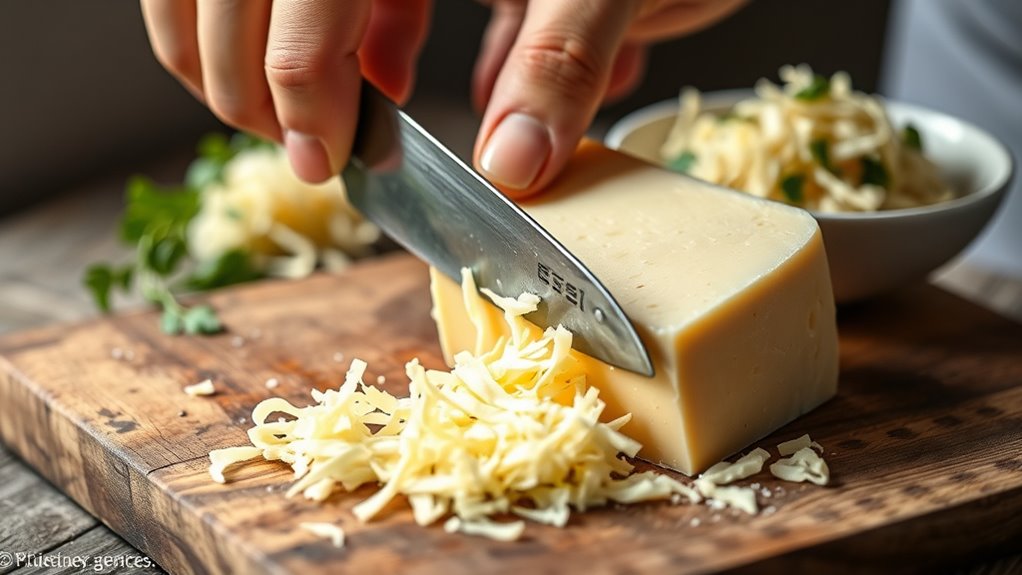
Start by chilling the cheese to make it firmer and easier to handle. Then, use a sharp knife to slice thin strips or kitchen scissors to cut shreds, working carefully on a stable surface.
For softer cheese, freeze it slightly before cutting to avoid sticking and ensure cleaner shreds.
A food processor also works well when pulsed briefly to shred cheese quickly.
To prevent mess, try shredding onto parchment paper and toss the cheese with a bit of cornstarch to keep the shreds separate.
Keep going to discover more tips and tricks for perfect shredding.
Key Takeaways
- Chill the cheese for 10-15 minutes to firm it before slicing or shredding without a grater.
- Use a sharp knife to cut thin strips, then cross-cut for shredded pieces on a stable cutting board.
- Kitchen scissors can cut cheese into shreds, especially for semi-hard varieties, minimizing mess and cleanup.
- Food processors with shredding attachments quickly shred cheese by pulsing small chunks carefully.
- Prevent clumping by tossing shredded cheese with a pinch of flour or cornstarch before storing.
When and Why to Shred Cheese Without a Grater

Although using a grater is the most common way to shred cheese, you might find yourself without one or dealing with cheese that’s too soft or sticky. In these moments, shredding cheese without a grater becomes essential. You may also want to avoid grating if you’re short on time or want a different texture for your dish.
Sometimes, cheese clogs the grater, making the process messy and frustrating, so using alternative methods saves you hassle. Plus, if you’re traveling or in a kitchen without a grater, knowing other techniques keeps you prepared. Understanding when and why to shred cheese without a grater helps you adapt quickly, ensuring your recipes turn out just right without relying on specific tools.
Which Cheeses Are Best for Grater-Free Shredding

When choosing cheeses to shred without a grater, you’ll want to pick those that hold their shape well and don’t become too sticky or crumbly. Cheeses like cheddar, mozzarella, and Monterey Jack work great because they’re firm enough to slice or tear into thin strips. Avoid super soft cheeses like Brie or fresh goat cheese, as they tend to smear rather than shred.
Hard cheeses like Parmesan or Pecorino Romano are trickier since they’re brittle and can crumble, but if chilled, you can carefully break them into small pieces. Semi-hard cheeses also respond well to grater-free shredding methods. By selecting the right cheese, you’ll make the process smoother and get better results without needing a traditional grater.
How to Shred Cheese Quickly and Safely With a Knife

If you want to shred cheese quickly and safely without a grater, using a knife is a practical skill to master. Start by chilling your cheese in the fridge or freezer for about 15 minutes; this firms it up and makes cutting easier. Place the cheese on a stable cutting board, then use a sharp chef’s knife.
Hold the cheese firmly with one hand, curling your fingers to protect them. Slice thin, even strips by cutting lengthwise, then turn those strips and cut across into smaller shreds. Keep your knife tip on the board for control and use a rocking motion.
Take your time to avoid slips, and make sure your knife is sharp to reduce effort and improve safety.
How to Shred Cheese Using a Food Processor
When shredding cheese with a food processor, start by picking the right blade—usually the shredding or slicing attachment works best. Make sure to cut the cheese into small chunks so it processes evenly.
Keep an eye on the time, pulsing just enough to avoid turning your cheese into mush.
Choosing The Right Blade
Although food processors come with various blades, choosing the right one is essential for shredding cheese efficiently. You’ll want to select the shredding or grating disc attachment specifically designed for cheese. This disc has small holes or blades that slice the cheese into fine, uniform shreds quickly without crushing it.
Avoid using the standard chopping blade, as it’ll turn your cheese into mush instead of shreds. Some processors offer multiple shredding discs for different shred sizes, so pick one based on whether you want fine or coarse cheese. Make certain the disc fits your food processor model snugly to prevent any wobbling or uneven shredding.
Using the correct blade saves time and ensures your cheese ends up perfect for recipes or toppings.
Processing Time Tips
Since shredding cheese too long can turn it mushy, you’ll want to pulse the food processor in short bursts rather than running it continuously. This gives you better control and prevents over-processing.
Keep an eye on the texture and stop as soon as the cheese reaches your desired shred size. Remember, softer cheeses need less time compared to harder ones.
| Cheese Type | Pulse Duration | Total Processing Time |
|---|---|---|
| Cheddar | 2 seconds per pulse | 10-12 seconds |
| Mozzarella | 1.5 seconds per pulse | 8-10 seconds |
| Parmesan | 3 seconds per pulse | 12-15 seconds |
| Swiss | 2 seconds per pulse | 10-13 seconds |
| Gouda | 2 seconds per pulse | 10-14 seconds |
Adjust as needed based on cheese firmness and shred size preference.
How to Shred Cheese With a Vegetable Peeler
If you don’t have a grater on hand, a vegetable peeler can quickly turn a block of cheese into thin, delicate shreds. Start by holding the cheese firmly on a cutting board. With your other hand, run the vegetable peeler down the side of the cheese block, applying gentle pressure.
This will create thin ribbons of cheese that resemble shreds. Rotate the cheese as you go to get even strips from all sides. Be careful not to peel too aggressively, or you might create larger chunks instead of shreds.
This method works best with firm cheeses like cheddar or gouda. Once you’ve peeled enough, gather the ribbons and lightly separate them with your fingers to mimic shredded cheese’s texture. It’s a quick, effortless alternative when a grater isn’t nearby.
How to Freeze Cheese for Easier Hand Shredding
Freezing certain cheeses like cheddar or mozzarella makes them firmer and easier to shred by hand. You’ll want to freeze your cheese for about 1-2 hours to get the best texture without making it too hard.
When you’re ready, thaw it just enough to handle without it getting too soft or crumbly.
Best Cheese Types
While shredding cheese by hand can be a challenge, choosing the right type makes the process much easier. Firmer cheeses like cheddar, gouda, and parmesan respond well to freezing, making them easier to shred without a grater. Softer cheeses, such as mozzarella or brie, tend to be too sticky and can clump, complicating the shredding.
When you freeze firm cheese, it firms up, allowing you to slice or crumble it more precisely by hand. Avoid very crumbly cheeses like feta, as they won’t shred well no matter the method. Instead, opt for semi-hard or hard cheeses that hold their shape.
This way, you’ll save time and effort, achieving nicely shredded cheese perfect for your recipes without relying on a grater.
Freezing Duration Tips
Because cheese needs just the right amount of time in the freezer to firm up properly, you’ll want to freeze it for about 30 minutes to an hour before shredding by hand. This brief chilling firms the cheese enough to break it into manageable pieces without making it too hard or brittle. Avoid freezing it longer than an hour, as overly frozen cheese can become crumbly and difficult to handle.
If your cheese is soft or fresh, lean toward the shorter end of the freezing window. Hard cheeses tolerate the full hour well. Always wrap the cheese tightly in plastic wrap or place it in an airtight bag to prevent freezer burn.
Following these freezing duration tips will make hand shredding easier and cleaner every time.
Thawing Methods Explained
Once you’ve chilled your cheese for easier shredding, you’ll need to thaw it just right to maintain that ideal texture. The best way is to transfer the cheese from the freezer to the fridge and let it thaw slowly for about 30 to 60 minutes. This keeps the cheese firm yet pliable, making it easier to shred by hand.
Avoid microwaving or leaving it out at room temperature for too long, as that can make the cheese too soft or even oily. If you’re in a hurry, a quick 10- to 15-second microwave burst on low power can help, but watch it closely. Proper thawing guarantees your cheese won’t crumble or stick, so you get neat, manageable shreds without a grater.
How to Shred Cheese Using Kitchen Scissors
If you don’t have a grater handy, kitchen scissors offer a surprisingly effective way to shred cheese. Start by chilling your cheese in the freezer for about 15 minutes; this firms it up, making it easier to cut. Then, hold the cheese block over a bowl or plate and snip small strips or shreds using sharp kitchen scissors.
Work steadily to create thin, even pieces. If the cheese is soft, you can freeze it longer or use parchment paper to prevent it from sticking to the scissors. This method works best with semi-hard cheeses like cheddar or mozzarella.
Plus, it’s quick, requires minimal cleanup, and gives you good control over shred size without needing any special tools.
How to Shred Cheese With a Mandoline Slicer
When you want perfectly thin cheese slices quickly, a mandoline slicer can be a great alternative to a traditional grater. First, set the mandoline to a thin slicing thickness. Secure the cheese with the hand guard or a firm grip to protect your fingers.
Carefully slide the cheese down the blade in smooth, even strokes. This method gives you uniform, delicate slices that you can stack and cut into thin strips, resembling shredded cheese. It works best with semi-hard cheeses like cheddar or gouda.
Remember to keep your fingers clear of the blade and work slowly for safety. Using a mandoline slicer saves time and effort while giving you control over the thickness, making it perfect when you want thin, consistent cheese shreds without a grater.
How to Soften Hard Cheese for Easier Shredding
Although hard cheeses can be challenging to shred, softening them slightly makes the process much easier. Start by letting your cheese sit at room temperature for about 10 to 15 minutes. This brief warming softens the cheese’s texture without making it too melty or sticky.
If you’re in a hurry, microwave the cheese for 10 to 15 seconds on low power—just enough to soften it without causing it to melt. Another option is to wrap the cheese in a damp paper towel and leave it out for a short time; the moisture helps soften the surface.
Once softened, your cheese will be less brittle and easier to slice or shred with tools like a knife or mandoline, giving you neat, manageable pieces without crumbling.
How to Prevent Mess and Clumps When Shredding Cheese
To keep your shredding clean and clump-free, chill the cheese before you start—it firms up and shreds more easily. Line your workspace with parchment paper to catch stray pieces and make cleanup a breeze.
After shredding, toss the cheese with a little flour to prevent the shreds from sticking together.
Chill Cheese Before Shredding
Chilling your cheese before shredding makes the process much easier and cleaner. When cheese is cold and firm, it holds its shape better, so you avoid mushy bits and clumps. Simply pop your cheese block into the fridge for at least 30 minutes or even 15 minutes in the freezer if you’re short on time.
Cold cheese shreds more uniformly, giving you neat, consistent pieces without the mess. Warmer cheese tends to become sticky and clump together, making shredding frustrating and uneven. By chilling it first, you’ll save effort and keep your workspace tidier.
Use Parchment Paper Lining
Keeping your cheese cold helps it shred cleanly, but preventing mess and clumps requires another simple trick: lining your workspace with parchment paper. This barrier keeps cheese shreds from sticking to surfaces and makes cleanup a breeze.
Here’s how to use parchment paper effectively:
- Lay a sheet of parchment paper on your cutting board or countertop before shredding.
- Shred your cold cheese directly onto the paper to catch all the pieces.
- Once done, gently fold the parchment paper to gather the shreds without crushing them.
- Transfer the cheese easily to your dish or storage container with minimal mess.
Using parchment paper keeps your workspace tidy, prevents shredded cheese from clumping, and speeds up cleanup, making shredding without a grater much smoother.
Toss Shreds With Flour
Although shredding cheese without a grater can be tricky, tossing the shreds with a bit of flour helps prevent clumping and keeps the pieces separate. After shredding, sprinkle a small amount of all-purpose flour or cornstarch over the cheese. Use your fingers or a spoon to gently toss the shreds, coating them evenly without crushing.
This simple step stops the cheese from sticking together, making it easier to sprinkle over dishes or mix in recipes. Be careful not to add too much flour, as it can alter the texture and taste. Just a light dusting is enough to keep your cheese fluffy and mess-free.
This technique works especially well with softer or freshly shredded cheese, ensuring a smooth cooking process.
How to Store Shredded Cheese Without a Grater
Once you’ve shredded your cheese without a grater, you’ll want to store it properly to maintain its freshness and prevent clumping. Here’s how to keep your shredded cheese in top shape:
- Use an airtight container or resealable plastic bag to keep moisture and air out.
- Add a small pinch of cornstarch or flour to absorb excess moisture and prevent clumps.
- Label the container with the date so you know when it’s best to use up the cheese.
- Store the cheese in the coldest part of your fridge, usually the back, to slow down spoilage.
Creative Ways to Use Cheese That’s Not Perfectly Shredded
Even if your cheese isn’t shredded perfectly, you can still put it to great use in your cooking. Chunky or uneven pieces melt beautifully in sauces or on top of casseroles, adding rich flavor and texture. You can also toss larger chunks into salads or soups for a delightful surprise.
Don’t hesitate to mix imperfect cheese into dips or blend it into scrambled eggs for extra creaminess.
Here’s a quick guide to creative uses:
| Use Case | Cheese Form | Benefit |
|---|---|---|
| Melting Sauces | Chunky pieces | Adds texture |
| Salads & Soups | Larger chunks | Burst of flavor |
| Dips & Eggs | Mixed sizes | Creamy consistency |
With these ideas, your imperfect cheese won’t go to waste!
Frequently Asked Questions
Can Shredded Cheese Be Used in Baking Recipes?
Yes, you can use shredded cheese in baking recipes. It melts evenly, adds flavor, and creates a nice texture.
Just make sure the cheese is fresh and shredded finely for the best results in your baked dishes.
How Long Does Shredded Cheese Last in the Refrigerator?
Shredded cheese lasts about 5 to 7 days in the refrigerator if stored in an airtight container or sealed bag.
Make sure to check for any mold or off smells before using it to keep it safe.
Is Shredded Cheese Suitable for Melting on Pizza?
Absolutely, shredded cheese melts perfectly on pizza! You might worry it won’t melt evenly, but if you use the right cheese like mozzarella, it’ll spread smoothly and make your pizza deliciously gooey every time.
Can You Shred Cheese Without It Sticking to Your Hands?
Yes, you can avoid cheese sticking by chilling it first, using a little oil or flour on your hands, and working quickly.
These tricks help you shred cheese smoothly without it clumping or sticking to your fingers.
What Are the Best Tools to Clean After Shredding Cheese?
You’ll want a sponge or brush with warm, soapy water to clean your tools effectively. A plastic scraper helps remove stuck cheese, and rinsing immediately prevents buildup.
Avoid abrasive scrubbers to keep surfaces smooth.
Conclusion
Now that you know how to shred cheese without a grater, you’re ready to tackle any cheesy craving with ease! Whether using a knife, food processor, or vegetable peeler, you’ll save time and avoid messes like a kitchen ninja.
Remember, even imperfectly shredded cheese can turn your dishes into flavor explosions worthy of a five-star chef. So go ahead, shred with confidence and enjoy every gooey, melty bite without breaking a sweat!
By mastering these simple methods to shred cheese without a grater, you can effortlessly enhance your meals and enjoy the perfect texture every time. Embrace these easy cheese shredding techniques and make your cooking experience smoother and more enjoyable!