How Can You Make Shakes Without a Blender in 7 Simple Steps?
You can easily make shakes without a blender by following seven simple steps that anyone can master at home. Creating delicious, creamy shakes without a blender is possible using basic kitchen tools and ingredients. With just a few techniques, you can enjoy smooth, flavorful shakes anytime, even without specialized equipment.
First, gather and measure your ingredients, using a creamy base like milk or yogurt. Next, mash soft fruits thoroughly with a fork or spoon. Combine everything in a jar or sturdy container, then whisk or shake vigorously until smooth.
Strain the mixture for extra creaminess, chill it briefly, and add your favorite toppings. Keep going to discover tips that perfect your no-blender shake technique.
Key Takeaways
- Mash ripe fruits thoroughly using a fork or spoon before mixing to ensure smooth texture without a blender.
- Combine all ingredients in a jar or sturdy container with a tight lid for easy manual mixing.
- Shake the container vigorously or whisk the mixture rapidly to blend ingredients evenly and break down lumps.
- Strain the mixture through a fine mesh sieve to remove any remaining lumps or solids for a smooth shake.
- Chill the shake for 30-60 minutes before serving to enhance texture and flavor without thickening excessively.
Why Make Shakes Without a Blender?

Although blenders are common kitchen tools, you might find yourself without one when craving a shake. Maybe your blender is broken, or you’re somewhere without access to one. You don’t have to skip that delicious treat just because of this.
Making shakes without a blender lets you enjoy your favorite flavors anytime, anywhere. It’s also a great skill to have when you want a quick, simple shake without pulling out extra appliances. Plus, you can control the texture more easily by mixing manually, avoiding over-blended results.
Whether you’re camping, at work, or just prefer a hands-on approach, knowing how to make shakes without a blender keeps your options open and your cravings satisfied.
Gather Ingredients for a Creamy Shake

Now that you know why making shakes without a blender can be handy, let’s focus on what you’ll need to create a creamy, delicious shake by hand.
Start with fresh, quality ingredients to get the best flavor and texture. You’ll want a creamy base, natural sweeteners, and optional add-ins for taste and nutrition.
| Ingredient | Purpose | Example Quantity |
|---|---|---|
| Milk or yogurt | Creamy base | 1 cup |
| Sweetener | Adds sweetness | 1-2 tbsp honey or sugar |
| Ice cubes | Chill & texture | 4-5 cubes |
| Flavoring | Enhances taste | 1 tsp vanilla extract |
| Optional boost | Nutrition/power | 1 tbsp peanut butter or protein powder |
Gather these, and you’re ready to craft that shake by hand!
Mash Fruits to Add Fresh Shake Flavor
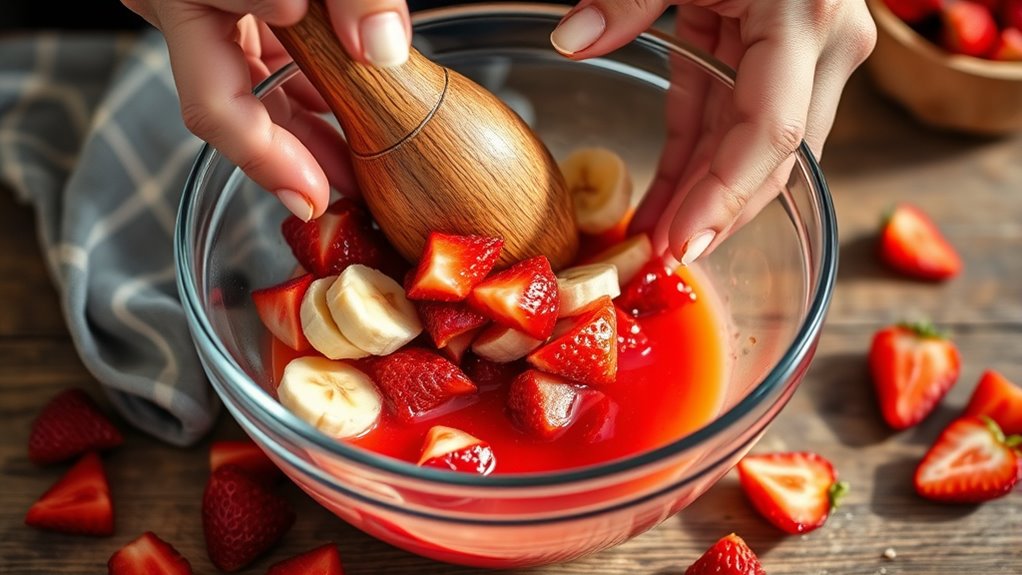
You can easily boost your shake’s flavor by mashing fruits like bananas, berries, or mangoes. Grab a fork or a potato masher to break them down quickly without a blender.
These simple tools make it easy to mix fresh fruit into your shake for a natural, tasty boost.
Best Fruits To Mash
What fruits mash best to bring out the freshest flavors in your shake? Bananas top the list for their creamy texture and natural sweetness, making your shake smooth without any extra effort.
Ripe berries like strawberries and raspberries mash easily and add vibrant color and a burst of tangy flavor. Peeled mangoes, with their soft flesh, create a tropical twist that’s both juicy and sweet.
Avocados aren’t sweet but mash into a rich, creamy base perfect for green shakes. Apples and pears, when cooked slightly or very ripe, can also be mashed for a mild sweetness and subtle texture.
Choose fruits that are ripe and soft—they’ll mash easily and blend well with your other ingredients, ensuring a fresh, flavorful shake every time.
Tools For Mashing Fruits
Although blending isn’t an option, you can still easily mash fruits using simple tools found in most kitchens. A fork works perfectly for softer fruits like bananas or berries; just press and twist until you reach the desired consistency.
If you have a potato masher, it’s great for breaking down slightly firmer fruits like cooked apples or pears. A sturdy spoon can also do the trick, especially when you press fruit against a bowl’s side.
For smaller quantities, a mortar and pestle offers excellent control and can create a smooth texture. Remember to choose tools that suit the fruit’s firmness to make mashing easier and faster.
These straightforward tools let you add fresh, natural fruit flavors to your shakes without needing a blender.
Shake or Whisk Ingredients Without a Blender
When a blender isn’t available, shaking or whisking ingredients by hand can still deliver a smooth, well-mixed shake. Use a sealed jar or a large bowl to combine your liquids, powders, and mashed fruits. Shake vigorously or whisk rapidly to break down lumps and blend everything evenly.
A tight lid or a fine whisk helps achieve a creamy texture.
Here’s a quick guide to your options:
| Method | Best For |
|---|---|
| Shaking in Jar | Quick mixing, no tools |
| Whisking | Smooth texture, control |
| Spoon Stirring | Light blending, simple |
Choose the method that suits your tools and shake consistency preference. Keep shaking or whisking until the mixture looks uniform.
Chill Your Shake for the Perfect Texture
To get the perfect texture, you’ll want to chill your shake for just the right amount of time—usually about 30 minutes. Using an ice bath or placing it in the fridge are the best ways to cool it quickly and evenly.
Chilling not only thickens your shake but also enhances the flavors and smoothness.
Ideal Chill Time
How long you chill your shake can make all the difference in achieving that perfect, creamy texture. Typically, you want to chill your shake between 30 to 60 minutes. Less than 30 minutes might leave it too warm, while over an hour could make it overly thick or icy.
Here’s a quick guide to help you find the ideal chill time:
| Chill Time | Texture | Notes |
|---|---|---|
| 15-30 mins | Lightly cool | Good for quick drinks |
| 30-45 mins | Creamy | Ideal balance of chill |
| 45-60 mins | Thick & cold | Best for thicker shakes |
Adjust based on your preference, but sticking to this range will help you get that smooth, enjoyable shake every time.
Best Cooling Methods
Chilling your shake just right depends on more than timing—it also matters how you cool it. The quickest way is to pop your shake into the fridge for 30 to 60 minutes, letting it settle evenly. If you’re in a hurry, place the shake in the freezer but check every 10 minutes to avoid freezing solid.
Another smart method is to pour your shake into an ice bath: fill a bowl with ice and water, then nestle your container inside, stirring occasionally. This cools it rapidly without diluting flavors. Avoid simply adding ice directly to your shake, as it waters down the taste.
Effects On Texture
When you chill your shake properly, you lock in a creamy, smooth texture that transforms every sip into a satisfying experience. Cooling allows the ingredients to meld, softening any gritty or uneven bits from mixing without a blender. It also thickens the shake naturally, giving it that rich mouthfeel you want.
If you skip chilling, your shake might taste thin or watery, lacking the indulgence you’re aiming for. Aim to refrigerate your shake for at least 30 minutes, stirring occasionally to keep it uniform. You can even chill it longer for an extra thick treat.
Just avoid freezing it solid, or you’ll lose the smoothness. Proper chilling is your secret weapon to perfect texture, turning simple ingredients into a deliciously creamy delight.
Customize Your Shake With Toppings and Mix-Ins
Although you’re making your shake without a blender, you can still create a deliciously personalized treat by adding your favorite toppings and mix-ins. Start with simple additions like crushed nuts, granola, or chia seeds for extra crunch and nutrition. Fresh or dried fruit pieces can bring bursts of natural sweetness and texture.
If you want a bit of indulgence, sprinkle chocolate chips, cocoa nibs, or shredded coconut on top. You can also stir in peanut butter or honey to enhance flavor and richness. Don’t forget spices like cinnamon or nutmeg to add warmth.
Troubleshoot Common No-Blender Shake Issues
If your no-blender shake turns out lumpy or uneven, don’t worry—you can fix it quickly with a few simple tricks. First, try shaking your mixture vigorously in a tightly sealed jar or bottle; this helps break up clumps and mix ingredients evenly.
If lumps persist, use a whisk or fork to stir vigorously until smooth. For thicker shakes, add a splash of milk or water to thin the mixture, making it easier to blend by hand.
If your ingredients don’t combine well, soften harder items like frozen fruit by letting them sit at room temperature for a few minutes before mixing. Finally, strain your shake through a fine mesh sieve to remove any stubborn lumps for a smoother texture.
Frequently Asked Questions
Can I Use Powdered Protein in No-Blender Shakes?
Yes, you can use powdered protein in no-blender shakes. Just mix it thoroughly with a liquid, like milk or water, using a whisk or shaker bottle. This helps avoid clumps and guarantees a smooth, tasty shake.
How Long Do No-Blender Shakes Stay Fresh?
Your no-blender shake stays fresh for about 24 hours when chilled tightly in the fridge.
Keep it cold, sealed like a treasure chest, and sip it within a day to savor every creamy, flavorful drop.
Are No-Blender Shakes Healthier Than Blender Shakes?
No, no-blender shakes aren’t inherently healthier than blender shakes. Your shake’s health depends on the ingredients you choose, not the method. You can make either version nutritious by using fresh fruits, veggies, and natural sweeteners.
What Are the Best Fruits for No-Blender Shakes?
Bananas and berries are your best allies, symbolizing smoothness and vibrant energy. Their soft texture and natural sweetness let you easily mash and mix, creating delicious no-blender shakes without sacrificing flavor or nutrition.
Can I Make No-Blender Shakes in Advance?
Yes, you can make no-blender shakes in advance. Just store them in an airtight container in the fridge, and give them a good shake or stir before drinking to refresh the texture and flavors.
Conclusion
Now that you know how to make shakes without a blender, you’re ready to whip up creamy, delicious drinks anytime—no fancy gadgets needed! With just a little muscle and creativity, you can mash, shake, and chill your way to shake perfection.
These steps are so simple, they’ll make you feel like a kitchen wizard conjuring up magic in a glass. So go ahead—shake things up and enjoy every sip!
Mastering how to make shakes without a blender means you can enjoy fresh, tasty shakes anytime, anywhere. Whether it’s a quick snack or a refreshing treat, these easy methods will become your go-to. Embrace the art of making shakes without a blender and savor every creamy, delicious moment!