How to Prepare a Cake Pan in 7 Easy Steps
To prepare your cake pan in 7 easy steps, it’s important to start by choosing the right cake pan size and material to suit your recipe. Proper cake pan preparation ensures even baking and easy cake removal, making a big difference in your baking results.
Whether you use metal, glass, or silicone pans, the right prep helps your cake come out perfectly every time.
Clean and dry your pan thoroughly to remove any residue or dust. Next, grease the pan evenly with butter, shortening, or oil to prevent sticking.
Line the bottom with parchment paper for an easy release. Then, dust the surface lightly with flour or cocoa powder, which adds an extra nonstick layer. Using nonstick spray can also provide additional protection.
Finally, double-check your prep before pouring in the batter. Follow these tips to bake your cake perfectly every time.
Key Takeaways
- Choose the right pan shape and size according to your recipe and ensure it is clean and dry before starting.
- Remove residue with warm, soapy water and dry the pan thoroughly, including corners and crevices.
- Grease the pan evenly with butter, shortening, or oil, covering all surfaces including sides and corners.
- Lightly dust the greased pan with flour or cocoa powder, tapping to distribute evenly without clumps.
- Line the pan with parchment paper, pressing it flat and wrinkle-free, then grease again for easy cake release.
Pick the Right Cake Pan
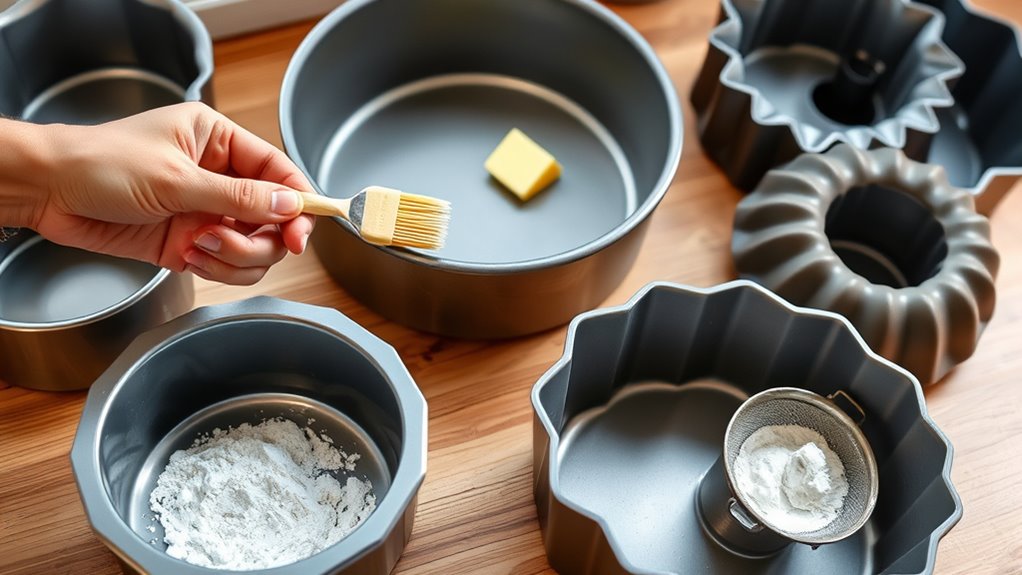
Before you start baking, you need to pick the right cake pan for your recipe. The shape and size of the pan affect baking time and cake texture, so choose carefully. Round pans are great for layer cakes, while square or rectangular pans work well for sheet cakes and brownies.
If your recipe calls for a specific size, stick to it to guarantee proper cooking. Consider the material too—metal pans conduct heat well, giving you a nicely browned crust, whereas glass pans heat slower, which might require adjustments to baking time. Nonstick pans make releasing the cake easier, but you should still grease them.
Keep your recipe’s instructions in mind, and select a pan that matches those guidelines for the best results.
Clean and Dry Your Cake Pan Thoroughly

Make certain you remove any leftover residue from your cake pan before you start baking. A clean pan helps your cake cook evenly and prevents sticking.
Also, guarantee the pan is completely dry to avoid batter clumping or uneven texture.
Remove Residue Completely
Although you might be enthusiastic to start baking, you need to make sure your cake pan is completely free of any old residue. Leftover bits can cause sticking or uneven baking.
Scrub the pan gently with warm, soapy water and a non-abrasive sponge. For stubborn residue, soak the pan for 10-15 minutes before scrubbing again. Avoid harsh tools that damage the pan’s surface.
Here’s a quick guide to residue removal techniques:
| Residue Type | Method | Tip |
|---|---|---|
| Grease | Warm soapy water | Use a degreasing soap |
| Baked-on bits | Soak + gentle scrub | Avoid metal scrubbers |
| Flour residue | Dry brush + wipe | Use a soft brush or cloth |
Removing residue completely ensures your cake bakes evenly and releases easily.
Ensure Pan Is Dry
Once you’ve removed all residue, take a moment to confirm your cake pan is completely dry. Any moisture left on the surface can cause your batter to stick or bake unevenly. After washing, use a clean kitchen towel or paper towel to thoroughly dry the pan.
Pay close attention to corners and crevices where water tends to linger. If you’re short on time, you can also place the pan in a warm oven for a few minutes to evaporate any remaining dampness. Ensuring your cake pan is dry before adding batter helps achieve a smooth release and prevents soggy spots in your cake.
This simple step sets the foundation for a perfect bake every time, so don’t skip it.
Grease Your Cake Pan for Easy Release

To get your cake out cleanly, you’ll need to choose the right grease and apply it properly. Using the best techniques guarantees your cake won’t stick or break apart.
Let’s go over some simple tips for non-stick success.
Choosing The Right Grease
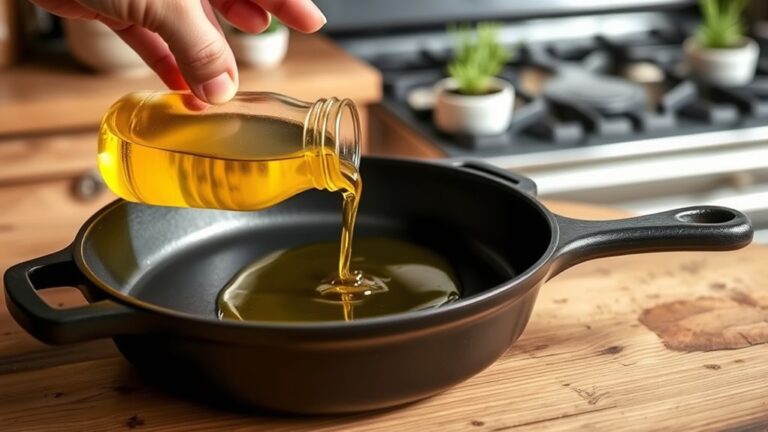
When you grease your cake pan properly, your cake will come out easily without sticking or breaking apart. Choosing the right grease is key to this. Butter adds rich flavor and browns nicely but can burn if your pan is too hot.
Shortening offers a neutral taste and creates a smooth, even coating that prevents sticking well. Oil works great for bundt or silicone pans since it spreads thinly and won’t solidify. Non-stick sprays are convenient but sometimes contain additives that affect texture, so use them sparingly.
Avoid using too little grease; a thin, even layer is best. Consider what type of cake you’re making and the pan material to pick the grease that will give you easy release and the best results.
Application Techniques That Work
How exactly should you apply grease to guarantee your cake releases effortlessly? Start by using a pastry brush, paper towel, or your clean fingers to spread a thin, even layer of grease across every inch of your cake pan. Don’t rush—cover the corners and sides thoroughly, or your cake might stick.
Once greased, lightly dust the pan with flour or cocoa powder to add a non-stick barrier. This extra step can make all the difference.
Remember, gentle and consistent application works best. Avoid puddles or thick clumps, as they cause uneven baking and sticky spots.
- Feel confident knowing your cake will pop out perfectly every time
- Enjoy the ease of cleanup with no stubborn stuck bits
- Relish the satisfaction of a flawless, professional-looking cake release
Tips For Non-Stick Success
Applying grease carefully sets the stage for a smooth cake release, but there are a few extra tips that can help you avoid sticking altogether. First, choose the right grease—softened butter or shortening works well, while cooking spray with flour is great for delicate cakes. Use a pastry brush or paper towel to spread the grease evenly, covering every corner and edge.
After greasing, dust the pan lightly with flour or cocoa powder for chocolate cakes; this adds an extra barrier. If your recipe calls for parchment paper, cut it to fit the pan’s bottom and grease the sides too. Finally, avoid skimping on the amount of grease; a thin but thorough layer guarantees your cake slides out easily without tearing.
These small steps make a big difference.
Line Your Cake Pan With Parchment Paper
Although it might seem like a small step, lining your cake pan with parchment paper makes a big difference in preventing your cake from sticking and guarantees a clean release. Start by cutting a circle of parchment paper to fit the bottom of your pan perfectly. Press it gently into place, ensuring it lies flat without wrinkles.
This simple action saves you from the frustration of a broken cake and messy cleanup.
By lining your pan, you’ll:
- Enjoy a smooth, flawless cake surface every time
- Avoid the stress of scraping stuck bits off your cake
- Feel confident that your cake will come out in one piece
Lining your pan is a smart, quick step that makes baking easier and more enjoyable.
Dust Your Pan With Flour or Cocoa Powder
Once you’ve lined your pan with parchment paper, dusting it with flour or cocoa powder creates an extra barrier that helps your cake release effortlessly. Sprinkle a small amount evenly, then tilt and tap the pan to coat all surfaces. For chocolate cakes, use cocoa powder to avoid white residue.
For lighter cakes, regular flour works best. This step reduces sticking and guarantees clean edges.
Here’s a quick guide:
| Cake Type | Dusting Choice |
|---|---|
| Chocolate Cake | Cocoa Powder |
| Vanilla/Light | Flour |
| Nutty or Spiced | Flour or Cocoa |
Dusting is simple but vital for a smooth release and a perfect cake shape.
Use Nonstick Baking Spray on Your Cake Pan
Dusting your pan helps prevent sticking, but using a nonstick baking spray adds an extra layer of protection that makes releasing your cake even easier. When you spray your pan evenly, you guarantee every nook and cranny is covered, preventing any batter from clinging to the surface. This simple step saves you from the frustration of a ruined cake and keeps your pans in great shape.
Using nonstick spray will:
- Give you confidence that your cake will slide out perfectly every time
- Save you from the disappointment of a cracked or stuck cake bottom
- Make cleanup quick and stress-free, so you can enjoy baking more
Spray your pan generously, and you’ll thank yourself when your cake pops out flawlessly!
Check Your Cake Pan Prep Before Adding Batter
Before you pour your batter, take a moment to inspect your cake pan to assure it’s fully prepared. Check that the nonstick baking spray covers the entire surface evenly, including corners and edges, to prevent sticking. If you notice any bare spots, apply a light additional coat.
Make sure the pan is dry—excess moisture can affect how your cake bakes. If you lined the pan with parchment paper, confirm it’s smooth and firmly pressed against the bottom and sides with no wrinkles or gaps.
A properly prepped pan ensures your cake releases cleanly and bakes evenly. Taking these quick steps now will save you frustration and help your cake come out perfectly every time.
Frequently Asked Questions
Can I Reuse Parchment Paper for Multiple Cakes?
You can reuse parchment paper if it’s still clean and undamaged, but don’t reuse it if it’s greasy or browned.
Doing so might affect your cake’s texture or cause sticking, so use fresh sheets for best results.
How Do I Fix a Cake That Sticks Despite Greasing?
You can fix a sticky cake by gently running a knife around the edges, then warming the pan slightly to loosen it.
Next time, try dusting with flour or using parchment paper to prevent sticking altogether.
What if I Don’t Have Nonstick Baking Spray?
Don’t worry if you lack nonstick spray—you can grease your pan with butter or oil, then dust it lightly with flour or cocoa powder.
This simple trick keeps your cake from sticking and bakes evenly every time.
Can I Use Other Types of Flour for Dusting?
Yes, you can use other flours like rice or almond flour for dusting, but stick with light, neutral options. They help prevent sticking without altering the cake’s flavor or texture, unlike heavier or sweetened flours.
How Do I Store Cake Pans to Prevent Damage?
Think of your cake pans as treasure chests—store them stacked with paper towels or cloth between each to prevent scratches.
Keep them in a dry, cool place, and avoid heavy items on top to protect their shine and shape.
Conclusion
Preparing your cake pan is like laying the foundation for a beautiful house—it sets the stage for everything that follows. Just as a sturdy base supports the walls, your careful steps ensure your cake bakes perfectly and releases effortlessly.
When you pick, grease, and line your pan with care, you’re building a sweet masterpiece from the ground up. So, take your time and enjoy the process.
Great cakes start with great preparation! Proper cake pan preparation, including choosing the right pan, greasing, and lining, is key to baking success and makes all the difference in your final dessert.