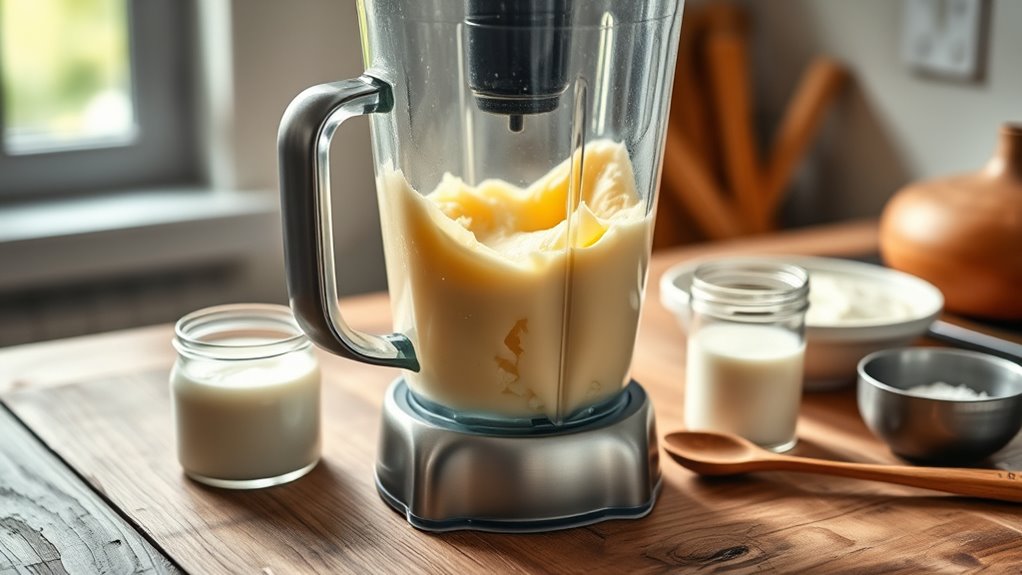
Can You Make Butter in a Blender in 10 Easy Steps?
Yes, you can make butter in a blender in 10 easy steps using heavy cream with at least 35% fat. Making homemade butter in a blender is a simple and fun way to enjoy fresh, creamy butter without any additives.
Start by blending cold cream on medium until it whips, then keep blending until solids separate from liquid.
Strain and press the butter to remove buttermilk, rinse with cold water, then add salt or flavorings if you like.
Store it chilled in airtight containers for freshness.
Keep going to discover tips for perfect texture and storage.
Key Takeaways
- Use cold heavy cream (≥35% fat) and a powerful blender with sharp blades for effective butter making.
- Blend cream on medium-high speed until it thickens, then continues until solids and liquids separate.
- Strain the mixture to separate butter from buttermilk, then rinse the butter in cold water.
- Press out excess moisture from the butter using a cheesecloth or towel for better texture and shelf life.
- Add salt or flavorings as desired, then store butter airtight in the refrigerator or freeze for longer preservation.
Ingredients Needed to Make Butter in a Blender

Before you start blending, you’ll need just a few simple ingredients to make butter in your blender. The main ingredient is heavy cream or whipping cream with at least 35% fat content. This high fat percentage is essential for the cream to separate into butter and buttermilk.
You can use fresh cream from the store or even homemade cream if you have access to it. Optionally, add a pinch of salt to enhance the flavor once your butter forms. Some people like to add herbs or garlic for a flavored butter, but that’s entirely up to you.
Avoid using low-fat or light creams, as they won’t produce the thick, creamy butter you’re aiming for. With these basics, you’re ready to start blending!
Choosing the Best Blender for Homemade Butter

You’ll want a blender with enough power to handle thick cream without overheating. The blade design also plays a key role in whipping the cream quickly and evenly.
Choosing the right blender makes the difference between smooth butter and a frustrating mess.
Blender Power Requirements
How much power does your blender need to turn cream into butter efficiently? You’ll want a blender with enough wattage to handle thick cream without overheating or stalling. Generally, a blender with at least 500 watts will do the job smoothly.
Here’s what to contemplate for blender power requirements:
- Minimum Wattage: Aim for 500 watts or more to ensure consistent blending and avoid motor strain.
- Continuous Operation: Check if your blender can run continuously for several minutes, as making butter takes time.
- Overheat Protection: Look for models with built-in thermal protection to prevent damage during extended use.
Choosing a blender with adequate power helps you make creamy, homemade butter without hassle.
Blade Design Importance
Having the right power in your blender sets the stage, but the blade design plays a big role in turning cream into butter efficiently. The shape, sharpness, and angle of the blades determine how quickly and evenly the fat separates from the liquid.
You want blades that create a strong vortex, pulling cream downward without splashing.
Here’s a quick comparison of blade features important for butter-making:
| Blade Feature | Importance for Butter Making |
|---|---|
| Sharpness | Cuts fat globules efficiently |
| Angle | Creates ideal swirl and vortex |
| Number of Blades | More blades improve chopping and mixing |
| Material | Stainless steel ensures durability |
| Blade Length | Longer blades reach more cream volume |
Choose a blender with well-designed blades to speed up the process and get fluffy, creamy butter every time.
Step 1: Pour Heavy Cream to Make Butter

Start by pouring two cups of cold heavy cream into your blender. Using cold cream is essential because it helps the fat separate more effectively when blending. Make sure your blender jar is clean and dry before adding the cream to prevent any unwanted flavors or contamination.
This step sets the foundation for turning cream into butter.
Keep these tips in mind:
- Use heavy cream with at least 36% fat content for maximum butter yield.
- Pour slowly to avoid splashing and overfilling the blender.
- Measure your cream accurately to guarantee consistent results every time.
Following these guidelines will prepare you perfectly for the blending process in the next step.
Step 2: Blend Cream Until Whipped
Once you’ve poured the cold heavy cream into the blender, you’ll want to blend it on medium speed until it thickens into whipped cream. Keep an eye on the texture as it changes—you’ll notice the cream becoming fluffy and soft peaks forming. This usually takes about 1 to 3 minutes, depending on your blender’s power.
Stop blending briefly to check the consistency by lifting the lid and watching how the cream holds its shape. Be careful not to overblend at this stage, as the cream can quickly shift from whipped to something denser. Achieving the perfect whipped cream texture is essential because it signals that the fat is starting to separate, setting you up for the next step in making butter.
Step 3: Keep Blending Until Butter Forms
Keep blending the cream until you see it separate into solid butter and liquid buttermilk. Watch closely for this visual change, which usually takes a few minutes, but don’t overdo it or your butter might turn greasy.
Timing is key to getting the perfect texture.
Visual Signs Of Butter
Although the blending process may seem slow at first, you’ll soon notice clear visual signs that butter is forming. As you keep blending, watch for these key changes:
- Separation of solids and liquids: The mixture will start to separate into a thick, creamy solid (butter) and a watery liquid (buttermilk).
- Change in texture: The solids clump together, becoming grainy and dense instead of smooth and fluffy like whipped cream.
- Color shift: The mixture shifts from white or pale cream to a more yellowish hue, indicating the fat is coming together.
Keep an eye out for these signs—they tell you that your butter is almost ready and you’re on the right track!
Timing The Process
While blending, you’ll want to pay close attention to the timing, as the process can vary depending on your blender’s power and the cream’s temperature. Typically, it takes anywhere from 3 to 7 minutes for butter to form. You’ll notice the cream first turning into whipped cream, then thickening, and finally separating into solid butter and liquid buttermilk.
Keep the blender running steadily but avoid stopping too often, as interruptions can slow the process. If your cream is cold, it might take longer, so be patient. Once you see solid clumps forming and the liquid separates clearly, you’ve reached the right point.
Timing is crucial to ensure you get firm, fresh butter without under- or over-processing.
Avoiding Over-Blending
Pay close attention as your cream moves from whipped texture to solid clumps with liquid separating out. This signals that butter is forming, but you don’t want to keep blending too long. Over-blending can make the butter grainy and tough.
To avoid this, follow these steps:
- Stop the blender as soon as you see the clumps and liquid (buttermilk) separating clearly.
- Use a spatula to check the texture—if it looks creamy and holds together, you’re done.
- Drain the buttermilk promptly to prevent the butter from continuing to blend and breaking down.
Step 4: Separate Butter From Buttermilk
Once the cream has thickened and clumped together, you’ll need to separate the butter from the liquid buttermilk. Start by pouring the contents of your blender into a fine mesh strainer or cheesecloth over a bowl. The butter will stay in the strainer, while the buttermilk collects below.
Gently press or shake the butter to release as much buttermilk as possible. This separation is essential because the buttermilk can make your butter spoil faster if left inside. Keep the buttermilk for recipes or drinking if you like.
At this point, your butter will still be soft and moist, but you’ve successfully isolated the solid part. Now you’re ready to move on to rinsing and pressing to remove the remaining liquid and shape your butter.
Step 5: Rinse and Press to Remove Liquid
After separating the butter from the buttermilk, you need to rinse and press it to remove any remaining liquid. This step ensures your butter stays fresh longer and improves its texture.
- Place the butter in a bowl of cold water. Gently press and fold it with a spatula or your hands to wash away residual buttermilk.
- Drain the cloudy water and repeat the rinsing process until the water runs clear, indicating most liquid is gone.
- Use a clean towel or cheesecloth to press the butter firmly, squeezing out any excess moisture.
Removing this liquid prevents spoilage and results in a creamier, more spreadable butter. Now your butter is ready for the next steps!
How to Add Salt and Flavorings to Blender Butter
Now that you’ve thoroughly rinsed and pressed out the liquid from your butter, it’s time to enhance its flavor. Start by adding salt—about 1/4 teaspoon per half cup of butter is a good baseline.
Then, mix in your favorite flavorings for a personalized touch. Use a spatula or spoon to blend everything evenly.
Here’s a quick guide to popular additions:
| Flavoring | Amount to Add |
|---|---|
| Sea Salt | 1/4 tsp per 1/2 cup |
| Garlic Powder | 1/8 tsp |
| Fresh Herbs | 1 tbsp (chopped) |
| Lemon Zest | 1 tsp |
| Honey | 1 tsp |
Feel free to experiment until you find your perfect blend!
How to Store Blender-Made Butter for Freshness
To keep your blender-made butter fresh, choose airtight containers that prevent exposure to air and odors. Store it in the coldest part of your fridge, ideally wrapped in parchment paper before sealing.
These steps help extend the butter’s shelf-life and maintain its creamy texture.
Optimal Storage Containers
Although homemade butter is delicious straight from the blender, storing it properly is key to maintaining its freshness and flavor. Choosing the right container prevents contamination and keeps your butter tasting great for longer.
Here are three ideal storage container options:
- Glass jars with airtight lids – These prevent air exposure and won’t absorb odors, keeping butter fresh.
- Plastic containers with tight seals – Lightweight and convenient, just ensure they’re BPA-free to avoid chemical leaching.
- Butter dishes with a cover – Designed specifically for butter, they provide easy access while protecting from air and light.
Avoid using metal containers, as they can react with the butter and affect taste. Pick a container that fits your fridge space and daily use habits for the best results.
Ideal Refrigeration Tips
When you store blender-made butter in the fridge, keeping it at a consistent, cool temperature helps preserve its texture and flavor. Aim for around 35-40°F (1.5-4°C) to prevent it from softening or developing off-flavors. Avoid placing the butter near the fridge door, where temperatures fluctuate more.
Instead, store it on a middle shelf or in the butter compartment if your fridge has one. Wrap the butter tightly with parchment paper or plastic wrap before placing it in an airtight container to minimize exposure to air and fridge odors. Let the butter sit at room temperature briefly before using to regain spreadability without compromising freshness.
Following these simple refrigeration tips ensures your homemade butter stays delicious and ready to enjoy.
Extending Butter Shelf-Life
Keeping your blender-made butter properly refrigerated is just the start of maintaining its quality. To extend its shelf-life, you need to store it correctly and handle it with care. Here’s how you can keep your butter fresh longer:
- Use an airtight container: Prevent exposure to air, which causes oxidation and rancidity. Glass or BPA-free plastic containers work well.
- Avoid cross-contamination: Use clean utensils every time to scoop butter to stop bacteria from spoiling it.
- Freeze for long-term storage: If you won’t use your butter within a week, freeze it in small portions. Thaw only the amount you need to keep the rest fresh.
Following these steps helps you enjoy your homemade butter at its best for as long as possible.
Troubleshooting Common Blender Butter Problems
If your blender butter isn’t turning out as expected, don’t worry—you’re not alone. One common issue is the cream not separating into butter and buttermilk. Make sure you’re using heavy cream with at least 35% fat and that it’s cold.
Blending too slowly or for too short a time can also prevent proper separation, so increase speed and blend for about 5-10 minutes. If the butter seems grainy or crumbly, it might be overworked; stop blending once the butter forms solid clumps.
Another problem is watery butter; try draining excess buttermilk thoroughly using a fine mesh strainer or cheesecloth. Finally, if your blender overheats, blend in shorter bursts to avoid overheating and preserve the cream’s texture.
Frequently Asked Questions
Can You Make Butter From Non-Dairy Cream Alternatives?
You can’t make traditional butter from non-dairy cream alternatives because they lack the fat structure needed.
However, you can blend some plant-based creams to create a butter-like spread with added oils and seasonings.
How Long Does Homemade Butter Last Compared to Store-Bought?
Your homemade butter usually lasts about a week in the fridge, while store-bought butter can last up to a month due to preservatives.
Keep yours tightly sealed and refrigerated to maintain freshness and prevent spoilage.
Is Blender Butter Healthier Than Commercial Butter?
Blending butter brings better benefits! You’ll get fresher fat without additives or preservatives, making it healthier than commercial butter.
Plus, you control the cream’s source, ensuring pure, potent, and preservative-free perfection every time.
Can You Use Flavored Cream to Make Butter?
Yes, you can use flavored cream to make butter. Just whip the cream until it separates, and you’ll get butter with a unique taste.
It’s a fun way to customize your homemade butter’s flavor.
What Are the Environmental Benefits of Making Butter at Home?
You’re choosing a greener path by making butter at home, cutting down on packaging waste and transportation emissions.
Plus, you control ingredients, reducing food waste and supporting a more sustainable, earth-friendly lifestyle with every creamy batch you create.
Conclusion
Making butter in a blender is as easy as pie once you get the hang of it. With just a few simple steps, you’ll turn heavy cream into creamy, homemade butter that’s fresher and more flavorful than store-bought. Remember, patience is your best friend here—keep blending until you see that golden goodness separate.
Soon, you’ll have a kitchen treasure that spreads joy on every slice of bread. Happy blending! Making butter in a blender is a fun and rewarding process that anyone can master. With these easy steps, your homemade butter will be a delicious addition to your meals and a satisfying kitchen project.