How Long to Cook Chicken Breasts in a Skillet
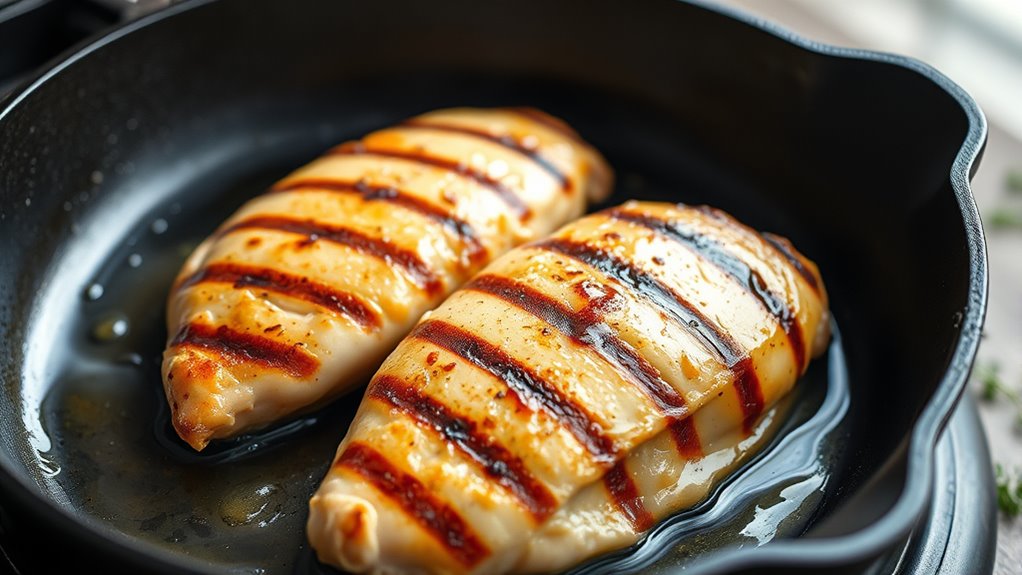
You should cook chicken breasts in a skillet for 6 to 8 minutes per side over medium heat, adjusting based on thickness. Cooking chicken breasts properly ensures they are juicy and safe to eat.
Thinner pieces take less time, while thicker ones need up to 10 minutes per side.
If cooking from frozen, expect about 50% longer and use a lid to guarantee even cooking.
Always check that the internal temperature reaches 165°F for safety.
Keep going to discover tips for juiciness and preventing common mistakes.
Key Takeaways
- Cook thawed chicken breasts 6–8 minutes per side over medium heat for even cooking and juiciness.
- Frozen chicken breasts need about 12–15 minutes per side with a lid to ensure thorough cooking.
- Use a meat thermometer to confirm internal temperature reaches 165°F (74°C) for safe consumption.
- Avoid high heat to prevent burning outside and raw inside; medium heat balances cooking speed and moisture.
- Let chicken rest after cooking to retain juices and improve tenderness before serving.
Ideal Cooking Times for Chicken Breast Thicknesses

When cooking chicken breasts in a skillet, the thickness of the meat directly affects how long you should cook it. For thinner cuts, around 1/2 inch thick, you’ll only need about 3 to 4 minutes per side over medium heat.
Thicker breasts, about 1 inch thick, usually require 6 to 7 minutes per side to cook through properly. If your chicken breasts are even thicker, say 1.5 inches or more, plan on cooking them for 8 to 10 minutes per side, but you might want to pound them thinner to cook more evenly.
Using a meat thermometer helps guarantee doneness without overcooking. Adjust your cooking time based on the size and thickness to avoid undercooked or dry chicken.
How Heat Affects Chicken Breast Cooking Time
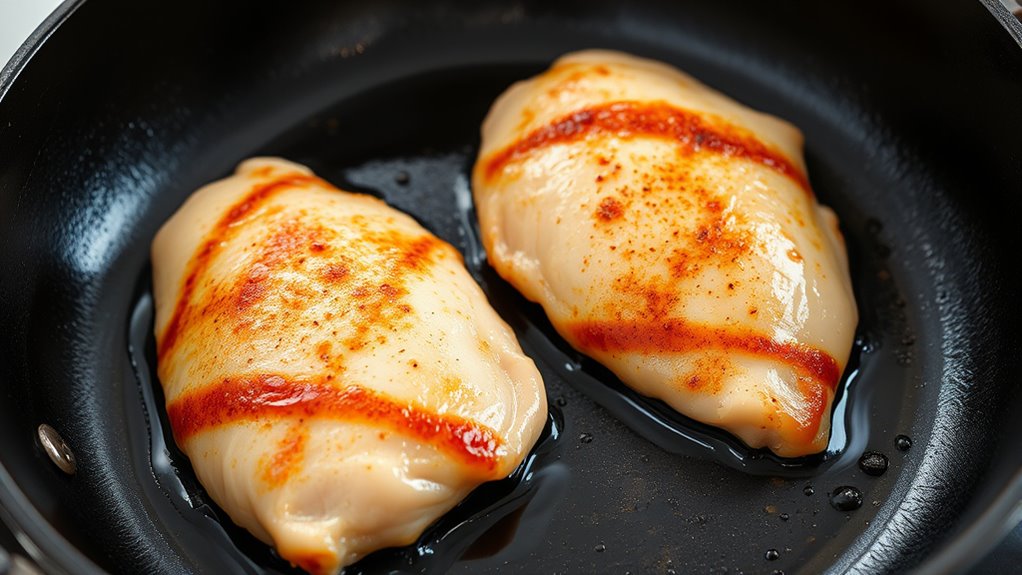
You’ll notice cooking chicken breasts over medium heat takes longer but helps distribute heat evenly, preventing dryness. High heat cooks faster but risks burning the outside while leaving the inside undercooked.
Managing temperature carefully guarantees your chicken stays juicy and perfectly cooked throughout.
Medium vs High Heat
Although higher heat cooks chicken breasts faster, it also increases the risk of burning the outside while leaving the inside undercooked. When you cook on high heat, the exterior sears quickly, but the inside might remain raw if you’re not careful.
Medium heat gives you more control, allowing the chicken to cook evenly and thoroughly without charring. If you want juicy, tender chicken, medium heat is usually your best bet. It takes a bit longer, typically around 6-8 minutes per side, but reduces the chance of overcooking.
High heat might cut cooking time to 4-5 minutes per side, but you’ll need to watch closely and flip often to avoid burning. Choose your heat level based on how much attention you can give the pan.
Heat Distribution Importance
Since heat rarely distributes evenly across a skillet, it directly affects how quickly and uniformly your chicken breasts cook. If one spot is hotter, parts of the chicken can overcook while others remain underdone. To avoid this, you should preheat your skillet thoroughly and use a pan that conducts heat well, like cast iron or stainless steel.
Moving the chicken occasionally helps, too, ensuring all sides receive consistent heat. Keep in mind that thicker areas will take longer to cook, so maintaining even heat helps prevent uneven cooking.
Temperature’s Role in Juiciness
When you control the cooking temperature carefully, you lock in the juiciness of chicken breasts while ensuring they cook through evenly. Too high a heat cooks the outside too fast, drying the meat before the inside is done. Too low, and the chicken takes too long, risking bacterial growth and a rubbery texture.
Aim for medium heat to balance speed and moisture retention.
| Temperature Setting | Approximate Time per Side | Juiciness Result |
|---|---|---|
| Low (250°F / 120°C) | 8-10 minutes | Tender but slow |
| Medium (325°F / 160°C) | 6-8 minutes | Juicy and cooked |
| Medium-High (375°F / 190°C) | 4-6 minutes | Slightly drier |
| High (425°F / 220°C) | 3-4 minutes | Risk of dryness |
How to Check If Chicken Breasts Are Fully Cooked

Ensuring your chicken breasts are fully cooked is essential for both taste and safety. The most reliable way to check is by using a meat thermometer. Insert it into the thickest part of the breast; once it reads 165°F (74°C), your chicken is safe to eat.
If you don’t have a thermometer, cut into the thickest part and look at the juices. They should run clear, not pink or red. The meat itself should be white and opaque, not translucent or shiny.
Avoid relying solely on cooking time since stove heat varies. Checking doneness accurately prevents undercooking, which risks foodborne illness, and overcooking, which dries out the meat. Always confirm before serving to ensure juicy, safe chicken.
Step-by-Step Guide to Cooking Chicken Breasts in a Skillet
First, you’ll want to properly prepare your chicken breasts by trimming and seasoning them. Next, heat your skillet to the right temperature to guarantee even cooking.
Finally, follow the recommended cooking time to get juicy, perfectly cooked chicken every time.
Preparing Chicken Breasts
Before you start cooking, make sure your chicken breasts are properly prepped to guarantee even cooking and great flavor. First, trim any excess fat or tendons from the chicken breasts to help them cook uniformly and avoid chewy bits.
Second, if the breasts are uneven in thickness, pound them gently with a meat mallet or rolling pin to an even thickness, about ¾ inch. This prevents thinner parts from drying out while thicker parts finish cooking.
Third, pat the chicken dry with paper towels; moisture on the surface will steam the meat instead of searing it, so drying ensures a better crust. Following these steps sets you up for perfectly cooked, juicy chicken breasts every time.
Cooking Time and Temperature
When you heat your skillet to medium-high, you’ll create the perfect environment to sear the chicken breasts and lock in their juices. Place the chicken breasts in the hot skillet without overcrowding them. Cook each side for about 5 to 7 minutes, depending on thickness, until the outside is golden brown.
Use a meat thermometer to check the internal temperature; it should reach 165°F (75°C) for safe consumption. If the breasts are thicker than an inch, consider lowering the heat to medium and covering the skillet to cook evenly without burning. Avoid flipping too often—once per side is enough.
Let the chicken rest for a few minutes after cooking to allow juices to redistribute, ensuring tender, flavorful results every time.
Tips for Keeping Chicken Breasts Juicy and Tender
Although cooking chicken breasts quickly is tempting, you’ll keep them juicy and tender by controlling the heat and using simple techniques like brining or marinating.
Here are three tips to help you achieve that perfect texture:
- Brine Before Cooking: Soak your chicken breasts in a saltwater solution for 15-30 minutes. This helps them retain moisture during cooking.
- Use Medium Heat: Cooking on too high heat can dry out your chicken. Keep the skillet at medium to cook evenly without burning.
- Let It Rest: After cooking, let the chicken rest for a few minutes. This allows the juices to redistribute, making each bite juicy.
Follow these steps, and you’ll enjoy tender, flavorful chicken breasts every time.
Using a Meat Thermometer for Chicken Breast Doneness
Since undercooked chicken can pose health risks, using a meat thermometer guarantees your chicken breasts reach the safe internal temperature without overcooking. Insert the thermometer into the thickest part of the breast for an accurate reading. The USDA recommends 165°F (74°C) as the safe temperature.
Checking early helps prevent dry, tough meat. Here’s a quick guide to thermometer readings and their effects:
| Temperature (°F) | Doneness Level | Texture Description |
|---|---|---|
| 145 | Rare | Very juicy, slightly raw |
| 155 | Medium | Juicy, slightly firm |
| 165 | Well done | Fully cooked, tender |
| 175 | Overcooked | Dry, tough |
| 185+ | Dry | Very dry, fibrous |
Use these readings to cook perfectly juicy chicken every time.
Adjusting Cooking Time for Frozen or Thawed Chicken Breasts
If you cook chicken breasts straight from the freezer, you’ll need to increase the cooking time to guarantee they reach a safe internal temperature. Frozen chicken takes longer because the heat has to penetrate the ice crystals before cooking the meat. Here’s how to adjust:
Cooking frozen chicken breasts requires extra time to ensure they reach a safe temperature through the ice crystals.
- Increase cooking time by about 50% compared to thawed breasts—typically 12-15 minutes per side on medium heat.
- Use a lid while cooking frozen chicken to trap heat and cook more evenly.
- Check internal temperature frequently with a meat thermometer, aiming for 165°F (74°C) to ensure safety.
If you thaw chicken first, cooking times will be closer to fresh chicken, usually 6-8 minutes per side. Always confirm doneness with a thermometer for best results.
Common Mistakes That Dry Out or Undercook Chicken Breasts
When you rush cooking chicken breasts or skip key steps, you risk ending up with dry, tough meat or undercooked pieces that aren’t safe to eat. One common mistake is cooking chicken breasts straight from the fridge without letting them come to room temperature. This leads to uneven cooking.
Another is using too high heat, which can burn the outside while leaving the inside raw. Overcrowding the skillet also causes steaming instead of searing, resulting in rubbery texture. Skipping the resting period after cooking lets juices escape when you cut in, making the meat dry.
Finally, not using a meat thermometer means you might guess the doneness wrong, either undercooking or overcooking. Avoid these errors to get juicy, fully cooked chicken breasts every time.
Easy Ways to Boost Flavor on Skillet Chicken Breasts
Although cooking chicken breasts perfectly is important, boosting their flavor can make all the difference in your meal. Here are three easy ways to amp up the taste on your skillet chicken breasts:
- Marinate before cooking – Use a simple mix of olive oil, lemon juice, garlic, and herbs. Let the chicken soak for at least 30 minutes to absorb bold flavors.
- Season generously – Don’t just salt and pepper. Add spices like smoked paprika, cumin, or Italian seasoning right before cooking to create a flavorful crust.
- Finish with a pan sauce – After cooking, deglaze the skillet with broth, wine, or lemon juice. Stir in butter and fresh herbs to make a quick sauce that adds richness and moisture.
Try these tips and enjoy chicken breasts bursting with flavor every time!
Frequently Asked Questions
Can I Cook Chicken Breasts in a Skillet Without Oil?
Yes, you can cook chicken breasts in a skillet without oil, but you’ll need a non-stick pan and lower heat to prevent sticking. Adding a splash of water or broth helps keep the meat moist while cooking.
This method works well if you want to reduce fat intake. Just be sure to watch the heat carefully to avoid burning.
Using a lid can also help retain moisture and cook the chicken evenly.
What Side Dishes Pair Best With Skillet-Cooked Chicken Breasts?
You’ll want sides that dance alongside your chicken, like garlic mashed potatoes, roasted veggies, or a crisp green salad. These flavors complement your skillet-cooked chicken perfectly, turning your meal into a harmonious symphony of taste and texture.
How Do I Store Leftover Cooked Chicken Breasts Safely?
You should cool leftover chicken breasts quickly, then store them in an airtight container. Keep them in the fridge for up to four days, or freeze for up to four months to maintain freshness and safety.
Can I Marinate Chicken Breasts Before Skillet Cooking?
Yes, you can marinate chicken breasts before skillet cooking. Marinate for at least 30 minutes to enhance flavor and tenderness, but avoid over 24 hours to prevent texture changes.
Always pat dry before cooking for best results.
Is It Better to Cover the Skillet While Cooking Chicken Breasts?
Yes, you should cover the skillet while cooking chicken breasts. It traps heat and moisture, cooking the chicken evenly and keeping it juicy.
Just don’t overcook—check for an internal temperature of 165°F to be safe.
Conclusion
Now that you know the ideal cooking times and tricks for juicy chicken breasts, you’re ready to nail skillet cooking every time. Did you know that over 70% of home cooks overcook chicken, leading to dry meat? By monitoring thickness, heat, and using a meat thermometer, you’ll avoid that common mistake and enjoy tender, flavorful chicken.
Keep practicing these tips, and skillet chicken breasts will become a quick, delicious go-to meal for you! Mastering how long to cook chicken breasts in a skillet ensures perfectly cooked, juicy results every time. With the right technique, you can make skillet chicken breasts a staple in your kitchen.