Can You Make Peanut Butter in a Blender
Yes, you can make peanut butter in a blender, especially if it’s a high-powered blender like a Vitamix or Blendtec. Using a blender to make peanut butter is a convenient and cost-effective way to enjoy homemade spreads.
Just add roasted or raw peanuts, then blend while pausing to scrape the sides and avoid overheating.
It takes a few minutes and some patience, but you’ll get creamy, homemade peanut butter without any special gear. You can even customize flavors and textures with a few tweaks.
Keep exploring for tips on getting the perfect spread and storage advice.
Key Takeaways
- Yes, you can make peanut butter in a regular blender by crushing peanuts and blending until creamy with patience and occasional scraping.
- High-powered blenders like Vitamix or Blendtec work best due to strong motors and sharp blades for smooth peanut butter.
- Using roasted peanuts enhances flavor and helps achieve a smoother texture in the blender.
- Blending in short bursts with pauses and scraping sides prevents overheating and ensures even consistency.
- Store homemade peanut butter in an airtight container in the fridge for up to one month to maintain freshness and safety.
Can a Blender Really Make Peanut Butter?

Although blenders are typically designed for liquids and soft ingredients, you can definitely make peanut butter in one. When you blend peanuts, the blades crush and grind them into smaller pieces, releasing their natural oils. As you keep blending, these oils mix with the solid bits, transforming the mixture into a creamy spread.
You don’t need fancy equipment—just a regular blender and patience. However, you might need to stop occasionally to scrape down the sides and guarantee even blending. Keep blending until you reach your preferred consistency, whether smooth or chunky.
While blenders aren’t specialized for nut butters, they’re quite capable, letting you enjoy fresh, homemade peanut butter without extra gadgets.
What Type of Blender Works Best for Peanut Butter?

Now that you know a blender can make peanut butter, choosing the right type can make the process smoother and more efficient. High-powered blenders, like Vitamix or Blendtec, work best because their strong motors and sharp blades handle peanuts effortlessly, turning them into creamy butter quickly. You don’t want a weak blender that struggles and overheats.
If you have a standard blender, make sure it has multiple speed settings and a pulse option to control texture and prevent overheating. Also, a blender with a wide, sturdy jar helps the peanuts move freely, ensuring even blending. Avoid single-serve or low-watt blenders, as they might not provide the consistency or power needed for smooth peanut butter.
Choose a blender built for tough tasks for best results.
Choosing the Best Peanuts for Homemade Peanut Butter
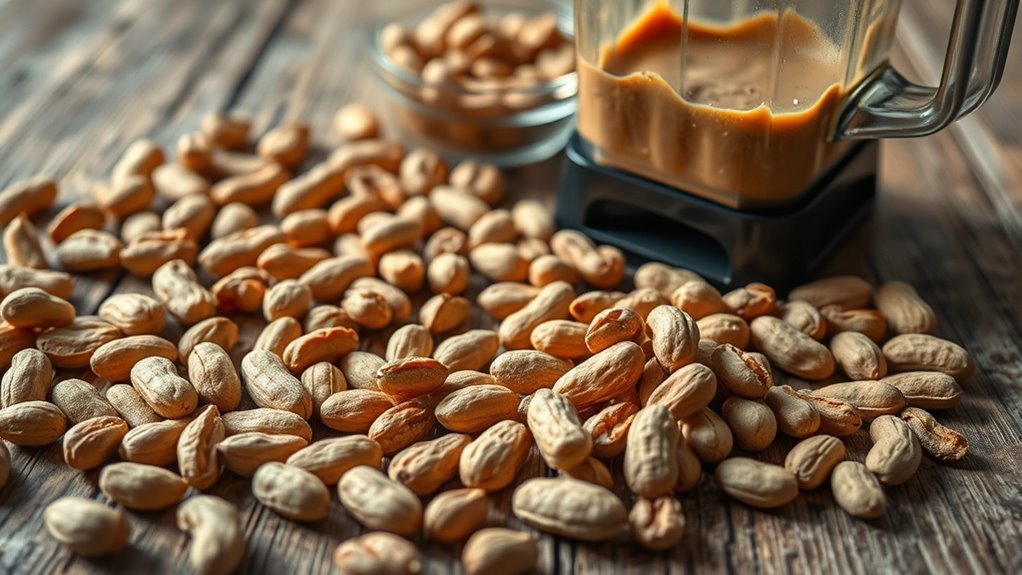
To make the creamiest peanut butter, you’ll want to pick the right peanuts. Choosing between raw or roasted peanuts affects both flavor and texture, so consider what taste you prefer.
Also, make sure your peanuts are fresh and high quality to get the best results.
Raw vs Roasted Peanuts
When deciding between raw and roasted peanuts for your homemade peanut butter, your choice will greatly affect the flavor and texture. Raw peanuts offer a mild, earthy taste and a softer texture, making them ideal if you want to control roasting yourself or prefer a less intense flavor.
Roasted peanuts, on the other hand, bring out a rich, deep nuttiness and a crunchier texture, enhancing the overall taste of your spread.
Consider these points when choosing:
- Raw peanuts let you customize roasting time and flavor.
- Roasted peanuts provide immediate bold flavor and aroma.
- The oil content varies, affecting creaminess and spreadability.
Pick based on your flavor preference and how hands-on you want to be in the process.
Peanut Quality and Freshness
Although choosing the right type of peanut matters, the quality and freshness of your peanuts play an even bigger role in making delicious homemade peanut butter. You want peanuts that smell fresh and nutty—not stale or rancid. Always check the expiration date if you’re buying pre-packaged peanuts, and avoid any that show signs of mold or discoloration.
If you get raw peanuts, store them in an airtight container in a cool, dark place to maintain their freshness. Fresh peanuts have a richer flavor and blend more smoothly, giving your peanut butter a better texture and taste. Remember, even the best blender can’t fix poor-quality or old peanuts, so start with the freshest ingredients for the best results.
How to Prepare Peanuts Before Blending
Before you start blending, you’ll want to prepare your peanuts properly to guarantee a smooth and creamy peanut butter. Start by ensuring your peanuts are dry since moisture can affect the texture and cause clumping.
Next, consider roasting your peanuts if they’re raw; this enhances flavor and helps release natural oils, making blending easier. Finally, remove any skins if you prefer a smoother consistency, though this step is optional.
Here’s a quick checklist to get your peanuts ready:
- Dry thoroughly to prevent clumping and spoilage.
- Roast evenly at 350°F for 10-15 minutes to boost flavor.
- Remove skins by rubbing peanuts between your hands or using a clean towel.
Proper prep sets the stage for perfect peanut butter in your blender!
How to Make Peanut Butter in a Blender
To make peanut butter in your blender, start by picking the right peanuts—roasted and unsalted work best.
You’ll want to blend in short bursts, scraping down the sides to get a smooth texture.
Don’t forget to adjust the flavor and consistency by adding salt, oil, or sweeteners to suit your taste.
Choosing The Right Peanuts
How do you pick the perfect peanuts for making peanut butter in a blender? Start by choosing fresh, high-quality peanuts to guarantee great flavor and texture. Look for these key qualities:
- Raw or roasted: Raw peanuts let you control roasting, while pre-roasted save time.
- Skin on or off: Skinned peanuts produce smoother butter; skins add texture and nutrients.
- Salted or unsalted: Unsalted peanuts give you control over seasoning.
Avoid peanuts that look shriveled or have an off smell, as these might be stale or rancid. Also, aim for a good balance between oil content and firmness; peanuts that are too dry won’t blend smoothly.
Blending Techniques And Tips
Although blending peanuts into creamy peanut butter might seem simple, mastering the right techniques guarantees smooth results without overheating your blender. Start by pulsing the peanuts in short bursts to break them down evenly. This prevents the motor from straining and helps you monitor the texture.
Scrape down the sides frequently to assure all peanuts blend uniformly. If your blender struggles, give it brief rests between pulses to cool off. Avoid running it continuously for too long to protect the blades and motor.
Use a tamper if your blender has one to push ingredients toward the blades safely. Following these steps keeps your blender happy and delivers a perfectly smooth peanut butter base ready for any tweaks you want to make next.
Adjusting Texture And Flavor
Once you’ve achieved a creamy peanut base, you can easily adjust the texture and flavor to suit your taste. If you like it chunkier, simply pulse the blender a few more times to add some crunch.
To enhance the flavor, consider these quick tweaks:
- Stir in a pinch of salt or a drizzle of honey for a sweet-salty balance.
- Add a splash of oil (like peanut or vegetable) to make it smoother and spreadable.
- Mix in cocoa powder or cinnamon for a unique twist.
Taste as you go, and don’t hesitate to experiment until it’s perfect for you. Adjusting texture and flavor is all about making your peanut butter exactly how you like it—fresh, personalized, and delicious.
How Long Does It Take to Blend Peanuts Into Peanut Butter?
Blending peanuts into creamy peanut butter usually takes between 3 to 5 minutes, depending on your blender’s power and the quantity of nuts. If you use a high-speed blender with a smaller batch, it might only take around 3 minutes. Larger quantities or less powerful blenders may require closer to 5 minutes to reach that smooth, spreadable consistency.
Make sure to pause occasionally to scrape down the sides, helping all peanuts blend evenly. Initially, the peanuts will turn into a crumbly texture, then gradually release oils and become creamy. Keep blending until you see the desired smoothness.
Avoid over-blending, as it can heat the mixture and affect the flavor. With a bit of patience, you’ll have fresh homemade peanut butter ready in minutes.
Additions That Enhance Homemade Peanut Butter
If you want to elevate your homemade peanut butter, consider adding ingredients that boost both flavor and texture. Simple additions can transform your peanut butter from basic to gourmet. Here are a few to try:
- Honey or maple syrup: Adds a touch of natural sweetness and balances the nutty flavor.
- Sea salt: Enhances the overall taste and creates a delightful contrast.
- Cinnamon or cocoa powder: Introduces warm, rich notes that deepen the flavor profile.
You can experiment by mixing these directly into the blender during the final blending stages. Adding extras like these lets you customize your peanut butter, making it uniquely yours every time.
Plus, it’s a great way to impress friends or treat yourself with a homemade twist.
How to Get the Perfect Peanut Butter Texture
To get the perfect peanut butter texture, you’ll want to blend until it’s smooth and creamy without overprocessing. Keep an eye on the consistency to avoid any gritty bits that can ruin the mouthfeel. Small pauses during blending can help you check and adjust the texture as needed.
Achieving Creamy Consistency
While making peanut butter in your blender, achieving that perfect creamy texture requires a few key steps. First, start with dry, roasted peanuts—they blend smoother than raw ones. Next, blend in short bursts, pausing to scrape down the sides to guarantee even processing.
Finally, add a touch of oil, like peanut or neutral oil, to help the mixture become silky without thinning it too much.
- Use high-speed blending for a smooth grind
- Pause frequently to prevent overheating and to mix evenly
- Incorporate oil gradually for ideal creaminess
Avoiding Grittiness
Although blending peanuts can be straightforward, avoiding grittiness requires careful attention to processing time and technique. To get that perfectly smooth texture, start by blending in short bursts, pausing to scrape down the sides. This guarantees even blending and prevents chunks from sticking.
Don’t rush the process; blending too briefly leaves pieces unprocessed, while over-blending can heat the nuts, altering flavor. Adding a small amount of neutral oil can help create a creamier consistency and reduce graininess. Also, consider using roasted peanuts—they break down more easily than raw ones.
Finally, if you still notice grit, try sifting your peanut butter through a fine mesh strainer for a super smooth finish. With these tips, you’ll get that ideal, creamy peanut butter every time.
Troubleshooting Common Blender Problems When Making Peanut Butter
If your blender struggles to turn peanuts into smooth butter, you’re not alone. Blenders can overheat, stall, or leave chunks behind. Here’s how to troubleshoot common issues:
- Blender overheating: Pause blending every 30 seconds to let the motor cool and avoid burning out.
- Peanuts sticking to sides: Stop blending and scrape down the sides with a spatula to keep everything moving evenly.
- Thick mixture stalling blades: Add a small amount of oil or peanut butter to loosen the blend and keep the blades spinning smoothly.
How to Store Homemade Peanut Butter Safely
Because homemade peanut butter lacks preservatives found in store-bought versions, you need to store it properly to keep it fresh and safe to eat. First, transfer your peanut butter into an airtight container to prevent exposure to air, which speeds up spoilage. Glass jars with tight-fitting lids work best.
Next, refrigerate your peanut butter immediately after making it. The cool temperature slows down bacterial growth and keeps the oils from going rancid. Avoid leaving it out at room temperature for more than a few hours.
Also, always use a clean spoon to scoop out peanut butter to prevent contamination. Properly stored, your homemade peanut butter should stay fresh for up to a month in the fridge. If you notice any off smells or mold, discard it right away.
Why Homemade Peanut Butter Tastes Better Than Store-Bought
When you make peanut butter at home, you get to control the ingredients and texture, resulting in a fresher, more natural flavor that store-bought versions often lack. You skip additives and preservatives, enjoying pure, roasted peanuts in every bite.
Plus, you customize the consistency—whether you like it chunky or smooth—tailoring it to your taste.
Here’s why homemade peanut butter tastes better:
- You use fresh peanuts roasted to your preferred level, enhancing aroma and depth.
- You avoid added sugars, oils, and salt, so the flavor shines naturally.
- You can mix in extras like honey or cinnamon for a personal touch.
Frequently Asked Questions
Can I Use Other Nuts Besides Peanuts to Make Nut Butter in a Blender?
Yes, you can use other nuts like almonds, cashews, or walnuts to make nut butter in a blender. Just roast them first, then blend until smooth, adding oil or salt to achieve your desired texture and flavor.
Is It Necessary to Peel Peanuts Before Blending?
Peeling peanuts before blending isn’t a must; their skins add a bit of texture and earthiness to your butter. However, if you want a smoother spread, you might want to strip them like peeling a delicate fruit.
How Much Peanut Butter Does One Batch Typically Yield?
One batch typically yields about one cup of peanut butter. Depending on your blender’s capacity, you can adjust the peanut quantity, but expect roughly this amount from a standard 1 to 1.5 cups of peanuts.
Can I Add Sweeteners or Salt During Blending for Flavor?
Absolutely, you can toss in sweeteners or salt while blending! It’ll transform your peanut butter into a flavor explosion.
Just add a pinch or a drizzle, blend, and taste until it’s just right for you.
Will Homemade Peanut Butter Last as Long as Store-Bought?
No, homemade peanut butter won’t last as long as store-bought because it lacks preservatives. You should keep it refrigerated and use it within a couple of weeks to enjoy the best flavor and freshness.
Conclusion
You might think a blender isn’t built for peanut butter, but coincidentally, it’s perfect! With the right peanuts and prep, your blender can whip up creamy, fresh peanut butter faster than you’d expect.
Plus, homemade beats store-bought every time in flavor and freshness. So, next time you’re craving that nutty spread, grab your blender—turning peanuts into peanut butter has never been this easy or delicious!
Making peanut butter in a blender is a quick and rewarding way to enjoy a natural, preservative-free snack. Embrace the convenience and taste of homemade peanut butter with your blender today!