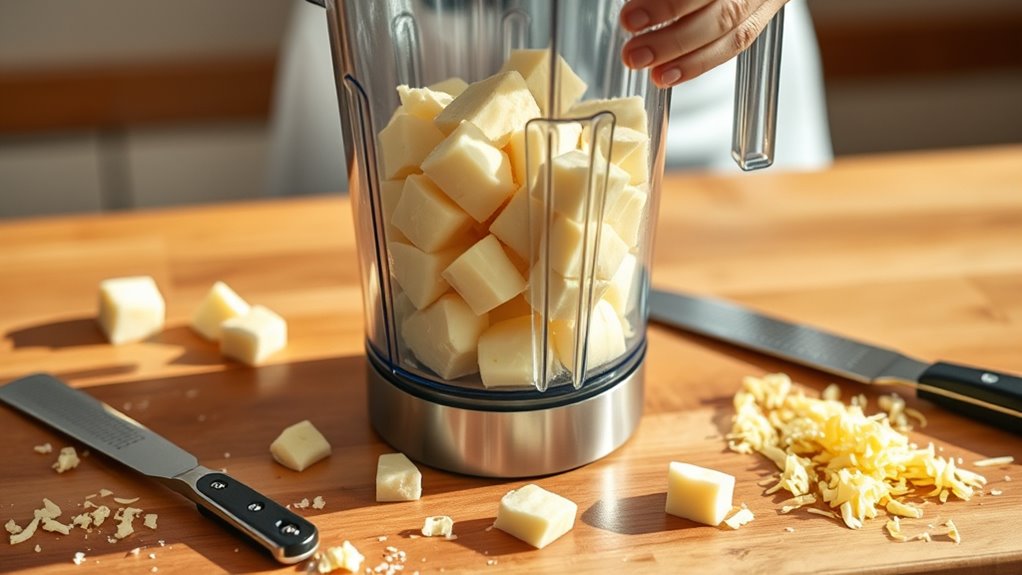
Can You Shred Cheese in a Blender in 7 Easy Steps?
Yes, you can shred cheese in a blender by following seven easy steps. Using a blender to shred cheese is a quick and convenient method that saves time compared to traditional shredding.
First, choose firm, moderate-moisture cheese and chill it well.
Cut the cheese into small cubes and avoid adding any liquids to prevent clumping or a mushy texture.
Use short pulses at low to medium speed with sharp blades to control shredding and achieve the perfect consistency.
After shredding, store the cheese properly in an airtight container to maintain freshness.
Clean your blender thoroughly with rinsing and scrubbing to remove any residue.
Keep going to discover tips that make this process even smoother.
Key Takeaways
- Choose firm, moderately moist cheeses like cheddar or mozzarella, and chill them for at least 1 hour before shredding.
- Cut cheese into small, uniform 1-inch cubes and remove any wax or rind to protect blender blades.
- Use the blender’s pulse function in short bursts (2-3 seconds) at low to medium speed to control shred size.
- Avoid high speeds and continuous blending to prevent cheese melting or turning into a paste.
- Clean the blender immediately by rinsing, soapy water blending, thorough rinsing, and gentle scrubbing to remove residue.
How to Choose the Best Cheese for Blender Shredding
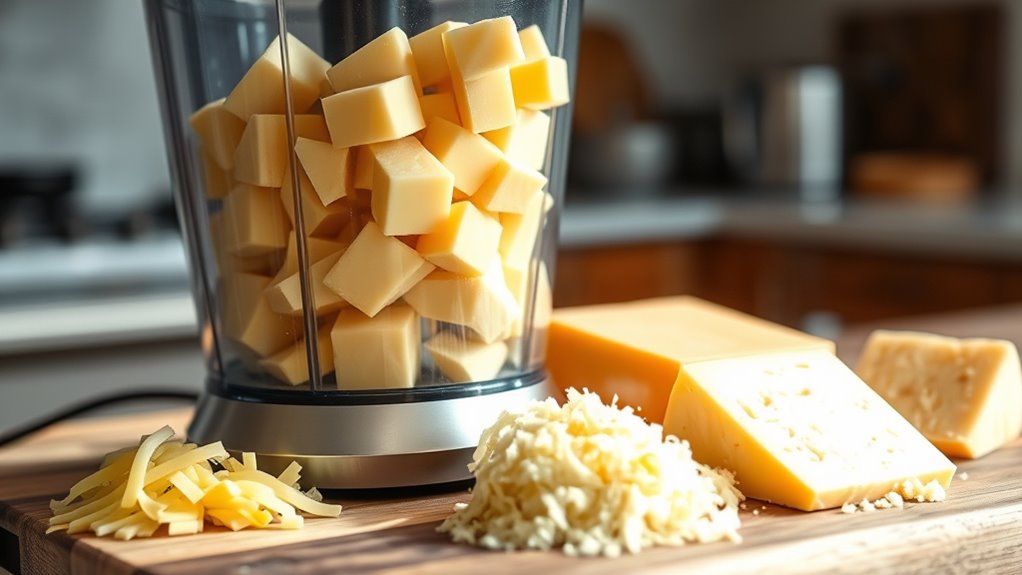
When choosing cheese for blender shredding, consider its texture and moisture content. You’ll want a cheese that’s firm but not too hard, like cheddar, mozzarella, or Monterey Jack. Soft cheeses, such as brie or cream cheese, aren’t ideal because they tend to clump and won’t shred evenly.
Similarly, very hard cheeses like Parmesan might strain your blender or shred into powder instead of flakes. Also, cheeses with moderate moisture shred better and won’t gum up your blades. Avoid wet or oily cheeses, as they can create a mushy texture.
How to Prepare Your Cheese for Blender Shredding

Choosing the right cheese sets you up for success, but preparing it properly before shredding in your blender is just as important. First, chill your cheese in the fridge for at least an hour; cold cheese is firmer and less likely to clump or turn mushy during blending.
Next, cut the cheese into small, uniform cubes—about 1-inch pieces—so your blender blades can handle them evenly. Avoid overly large chunks that strain the motor or uneven pieces that shred inconsistently.
If your cheese is too soft, pop it in the freezer for 10-15 minutes to firm up without freezing solid. Ultimately, make sure your blender jar is completely dry to prevent the cheese from sticking or clumping. Proper prep ensures smoother shredding and better results.
How to Shred Cheese in a Blender Step-by-Step

Now that your cheese is prepped, you’re ready to start shredding it in the blender. Be sure to adjust your blender settings to avoid over-processing and turning the cheese into mush.
Follow these simple steps to get perfectly shredded cheese every time.
Preparing Cheese Properly
Although shredding cheese in a blender might seem straightforward, preparing the cheese properly is essential to get the best results. Start by cutting your cheese into small, uniform cubes about 1-inch in size. This ensures even shredding and prevents overworking your blender.
If the cheese is too soft, chill it in the fridge for at least 30 minutes to firm it up; cold cheese shreds better and clumps less. Avoid using overly aged or crumbly cheeses, as they don’t shred well in blenders. Also, remove any wax or rind before shredding to protect your blades.
Finally, make sure your cheese is dry—pat it with a paper towel if it’s moist. Proper prep guarantees you for smooth, efficient shredding in your blender.
Blender Settings Tips
When you’re ready to shred cheese in your blender, selecting the right settings is essential to avoid over-processing or uneven shredding. Start with a pulse function to control the shredding time, preventing the cheese from turning into a paste. Use low to medium speeds to maintain texture and avoid melting from friction.
Here’s a quick guide to help you choose the best blender settings:
| Speed Setting | Duration | Result |
|---|---|---|
| Pulse | 2-3 seconds | Controlled shredding |
| Low | 5-7 seconds | Coarser shreds |
| Medium | 3-5 seconds | Moderate shredding |
| High | 2 seconds max | Quick, risk of melting |
| Off | – | Stop and check texture |
Adjust times based on cheese type and blender power.
Which Blender Settings Should You Use to Shred Cheese?
To shred cheese effectively, you’ll want to choose the right blender settings that balance speed and control. Using the pulse function can help you avoid over-processing and achieve the perfect texture.
Also, consider how the blade type impacts the shredding process to get the best results.
Optimal Speed Settings
While shredding cheese in a blender might seem straightforward, choosing the right speed setting is essential for achieving the perfect texture without turning it into a mush. Start with a low speed to gently break down the cheese into smaller chunks. This prevents overheating and clumping.
After a few seconds, gradually increase to medium speed to shred the cheese evenly. Avoid using high speed, as it can pulverize the cheese, creating a paste rather than shreds. Keep blending short and steady, checking the texture often.
If your blender has numbered settings, aim for speeds two to four out of ten. This range balances control and efficiency, giving you fluffy, well-shredded cheese perfect for cooking or topping dishes.
Pulse Function Benefits
Although shredding cheese with continuous blending can work, using the pulse function gives you much better control over the texture. Pulsing allows you to shred cheese in short bursts, preventing it from turning into mush. You can stop and check the consistency frequently, ensuring you get the perfect shred size.
It also helps avoid overheating the cheese, which can cause melting.
Here’s a quick comparison of pulse benefits:
| Feature | Continuous Blend | Pulse Function |
|---|---|---|
| Control | Low | High |
| Texture Outcome | Often fine or mushy | Adjustable, consistent |
| Heat Generation | Higher | Lower |
| Monitoring Ease | Difficult | Easy |
| Shred Size Flexibility | Limited | Flexible |
Use pulse for cleaner, customizable shreds every time.
Blade Type Impact
Mastering the pulse function sets you up for success, but the type of blades in your blender plays a big role in how well your cheese shreds. Blenders with sharp, multi-pronged blades handle cheese better, creating finer, more consistent shreds. If your blender has dull or flat blades, the cheese might clump or get mashed instead of shredded.
For the best results, use a blender with stainless steel, serrated blades that can easily cut through the cheese without crushing it. You’ll want to avoid high-speed continuous blending, as it can turn the cheese into a paste. Instead, stick to short, controlled pulses, letting the blades do the work.
Knowing your blade type helps you choose the right setting and achieve perfect shredded cheese every time.
How to Prevent Cheese Clumping in Your Blender
If you want to achieve evenly shredded cheese without clumps, you need to manage moisture and blending time carefully. Start by cutting the cheese into small, uniform pieces to guarantee smooth processing. Chill the cheese well before blending; cold cheese shreds better and clumps less.
Avoid adding any liquid, as moisture encourages clumping. Pulse the blender in short bursts rather than running it continuously—this gives you better control and prevents the cheese from turning into a sticky mass. If you notice clumps forming, stop blending and gently shake or tap the blender to separate the pieces.
Using a dry, clean blender jar also helps reduce moisture buildup. By following these steps, you’ll get fluffy, evenly shredded cheese without unwanted clumps.
Tips for Using Shredded Cheese From a Blender
Once you’ve shredded your cheese in a blender, you’ll want to use it quickly to maintain its freshness and texture. Keep the shredded cheese refrigerated if you’re not using it immediately, but aim to use it within a day or two for best flavor. When adding it to dishes, sprinkle the cheese evenly to guarantee consistent melting and taste.
Avoid packing it tightly, as air circulation helps keep it from clumping. If you plan to cook with the shredded cheese, toss it into your recipe right after shredding to enjoy smooth melting. Finally, measure your shredded cheese carefully to match recipe requirements, since blender shredding can produce varying sizes.
These tips help you get the most out of your blender-shredded cheese.
How to Clean Your Blender After Shredding Cheese
Because cheese can quickly stick to blender blades and walls, cleaning your blender immediately after shredding is essential to prevent buildup and lingering odors. Start by rinsing the blender jar with warm water to remove any loose cheese bits.
Next, add a few drops of dish soap and fill the jar halfway with warm water. Secure the lid and run the blender on low for about 30 seconds to loosen stuck cheese. Pour out the soapy water and rinse thoroughly with warm water.
For stubborn residue, use a soft sponge or brush to gently scrub the blades and jar. Finally, dry all parts completely before reassembling to avoid mold or unpleasant smells. Regular cleaning keeps your blender in top shape for future use.
Frequently Asked Questions
Can You Shred Frozen Cheese in a Blender?
You can shred frozen cheese in a blender, but you’ll need to pulse it carefully to avoid clumping or damaging the blades. Let it thaw slightly first for smoother shredding and better control over the texture.
This approach helps maintain the quality of the cheese. Be cautious not to over-process. Otherwise, the cheese may become too soft or sticky.
Is Shredded Cheese From a Blender Safe to Eat Raw?
If your cheese has been treated kindly and kept cool, you’re good to go eating it raw.
Just make sure it’s fresh and clean—no surprises there—so you can enjoy every tasty bite safely.
How Long Does Shredded Cheese Last in the Fridge?
You can keep shredded cheese in the fridge for about 5 to 7 days. Make sure to store it in an airtight container or sealed bag to maintain freshness and prevent it from absorbing other odors.
Proper storage helps extend the cheese’s quality and flavor. Always check for any signs of spoilage before use.
Can You Blend Other Dairy Products Like Butter or Cream Cheese?
You can blend butter and cream cheese like mixing paint on a palette—they soften and combine smoothly. Just pulse gently to avoid overheating, and you’ll get a creamy texture perfect for spreading or cooking.
Will Shredding Cheese in a Blender Affect Its Nutritional Value?
No, shredding cheese in a blender won’t affect its nutritional value. You’ll still get the same proteins, fats, and calcium.
Just be careful not to overheat it, as heat could slightly alter texture and flavor.
Conclusion
Shredding cheese in your blender is like turning raw clay into a beautiful sculpture—simple steps shape your masterpiece. By choosing the right cheese, prepping it well, and mastering your blender’s settings, you create perfect shreds without clumps.
Just like a skilled artist cleans their tools, you’ll keep your blender spotless for next time. So, jump in confidently—your delicious, shredded creation awaits to elevate every dish you craft!
With these easy steps, shredding cheese in a blender becomes quick and effortless. Whether you’re making pizza, salads, or sauces, freshly shredded cheese enhances every recipe. Embrace the convenience and enjoy perfectly shredded cheese every time.